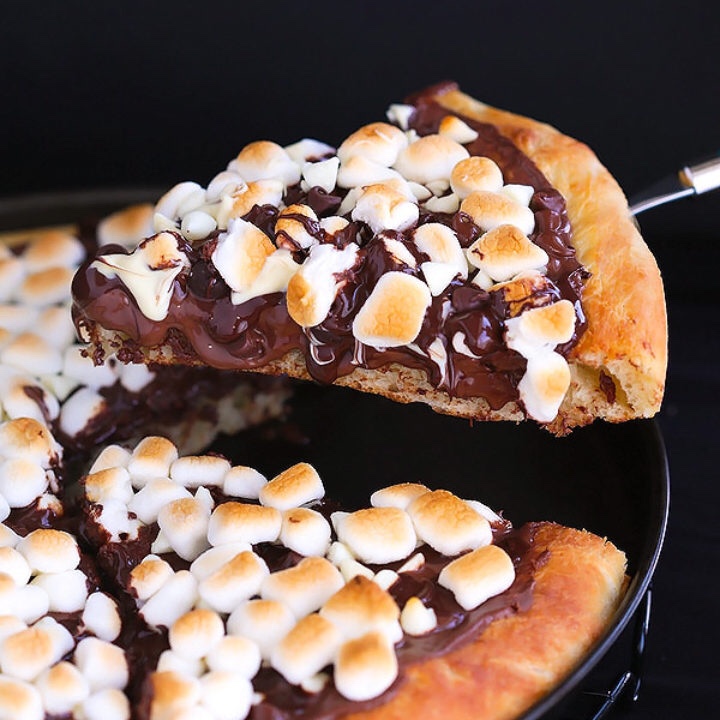
Pizza and s’mores in one delicious dish?! Yes, it is as good as it sounds and we couldn’t think of a better recipe to share on National Biscuit Day! It ticks all the boxes and is an ideal, party-pleasing, dessert to make in your pizza oven.
This recipe is fun for evenings on your patio when you want the feeling of going camping without leaving the comfort of your garden! You are guaranteed to fall in love with your pizza oven all over again when you try this irresistible dessert pizza.
• 9 Digestive biscuits (the best equivalent to Graham Crackers in the UK) – 6 crushed, 3 broken into small pieces
• 350g Milk chocolate
• 1 Bag of marshmallows (we used classic sized ones but you could experiment with mini mallows or giant ones!)
• Icing Sugar
Preparation
• Heat up your outdoor pizza oven to 1-2 Missisippi’s / 300+°C.
• Work the crushed digestives into the ball of handmade pizza dough.
• Use a rolling pin to flatten dough to 1/2 cm thickness in circular-shaped shell.
• Place dough on pizza screen and bake in your pizza oven for 1-2 minutes.
• Remove pizza dough from oven. Microwave chocolate or melt in a bowl over hot water (do not melt in your pizza oven it doesn’t work, we tried!) and brush across your pizza base.
• Sprinkle pieces of digestive biscuits and marshmallows on top of the chocolate.
• Place the pizza directly on oven hearth and bake until marshmallows are golden brown, this should take around 2-3 minutes. Turn the pizza as needed.
• Remove your pizza from the oven and dust with icing sugar as desired.
• We suggest serving warm with a big dollop of icecream!
If you want a wood burning oven of your own, the Morsø Forno is a great oven for a back garden pizza party!
Wallpaper has never gone out of style. But it’s also had a hard time shedding its reputation as old-fashioned and intimidatingly permanent – until now! A key trend for interiors in 2022, the public’s lust for wallpaper is only growing as the design industry gives it a whole new look and embraces nostalgia. Whatever your taste, there are wallpaper ideas for everyone, from traditional florals and fleur-de-lis to contemporary geometric and animal motifs.
The wonderful thing about wallpaper is wallpaper is a wonderful thing … It not only offers an instant pattern pop, but it’s also a great way to add personality, bring a theme together or update a whole living space with a new trend. Design experts will use wallpaper to create a feature wall, wrap a room in an all-over pattern, or play with panels for a unique look. It’s now a go-to method for décor transformations.
Join us as we take a look at the wallpaper trends making waves in the interior design world this year. Jam-packed with vivid colours and intricate patterns, now is not the time for pasty neutrals or safe stripy designs. Prepare to feast your eyes on inspiring, vibrant and fresh designs that will have you falling in love with wallpaper all over again.
FLORALS
If there’s one way to summarize the wallpaper ideas and trends for 2022 it’s with one word: biophilia. The term that no one really knew about until about a year ago is now widely used to describe an interior design that is inspired by nature and borrows from nature to create a harmonious interior space. Wallpaper designs have followed suit. nature-inspired interiors come top of the list of trends.
This trend began in 2020 when there was an increased demand for plants in the home and nature is now inspiring numerous areas of interior design, from botanical prints and natural materials to colours and even shapes.
PRINTS FROM THE ARCHIVES
Many popular wallpaper brands are reviving wallpaper patterns from literally hundreds of years ago as a key source of inspiration for new designs. Look up Sanderson Design’s Morris & Co range to see how they’ve re-worked some of the original William Morris textile designs from the 1870s!
INTO THE DEEP
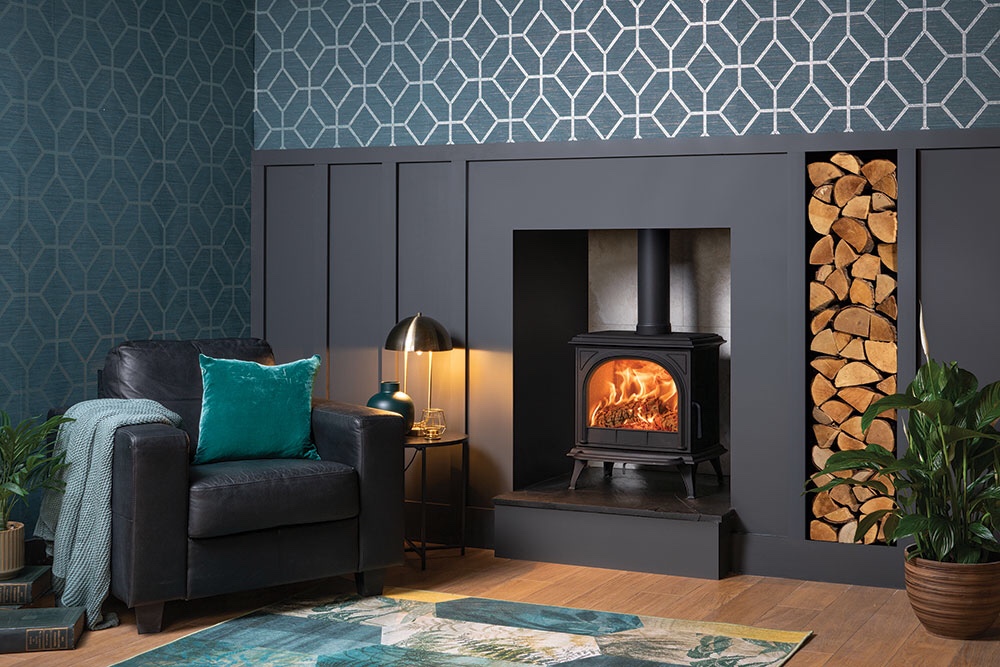
Blue is definitely having a moment, with blue room ideas dominating interior trends. It was only a matter of time before wallpaper caught up with the popularity of blue. If you want the trendiest shades, look for intense indigo and deep teal hues. Failing that, a rich navy is also huge in the world of wallpapers in 2022. Look for prints with geometric twists and quirky elements to keep it current.
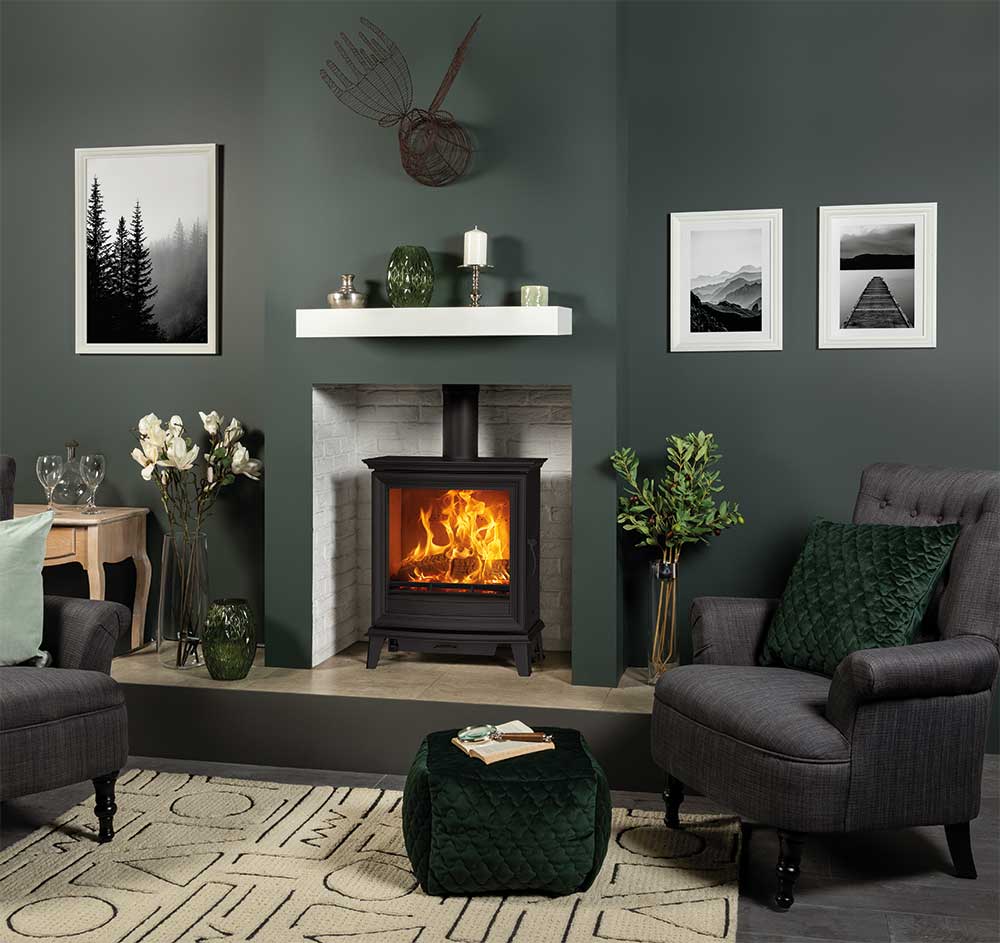
INTO THE WOODS
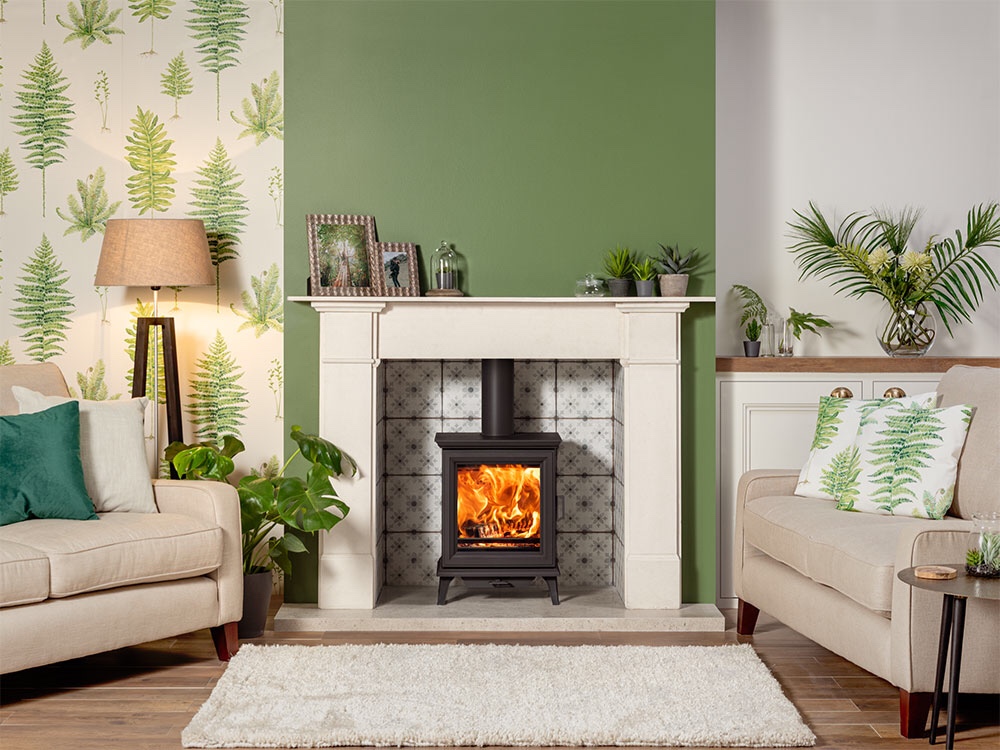
Opulent colours and emerald green are still proving very popular in interior trends. Wallpapers featuring abstract botanicals or animal prints for adults give these tones an earthy, forest vibe, perfect for creating tranquil havens.
CHATEAUCORE
Move over, Cottagecore! Chateaucore is coming to steal the limelight. Bridgerton has a lot to answer for! Wallpaper that looks like an expensive tapestry or patterned upholstery with antique motifs is what you’re looking for to achieve this latest trend. This look is best suited to French bedroom ideas and homes with period features or high ceilings.
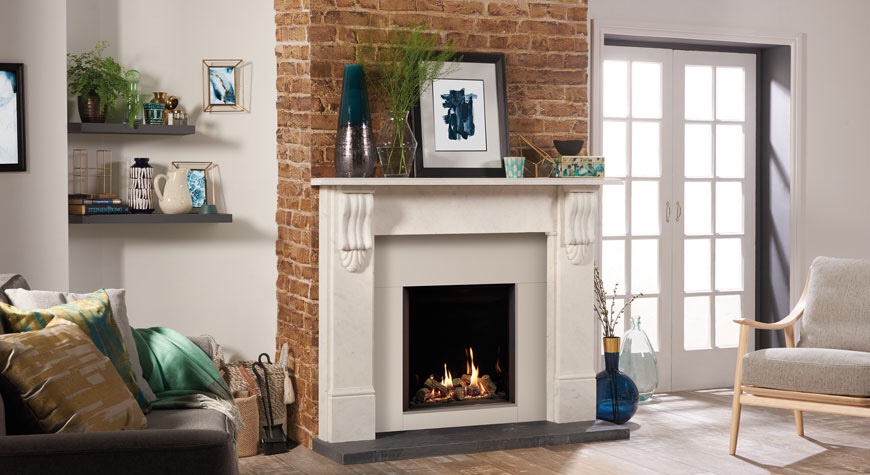
Say hello to our new favourite buzzword, mantelscaping, aka the art of styling your favourite home accessories on your mantelpiece.
The mantelpiece has never quite been in the spotlight quite as much as now. From the gorgeous, and often elaborate mantelscapes filling our Instagram feeds, to the most beautiful accessories and trinkets from our favourite local home retailers, we’ve all been inspired to take on this new trend.
SO, WHAT IS MANTELSCAPING?
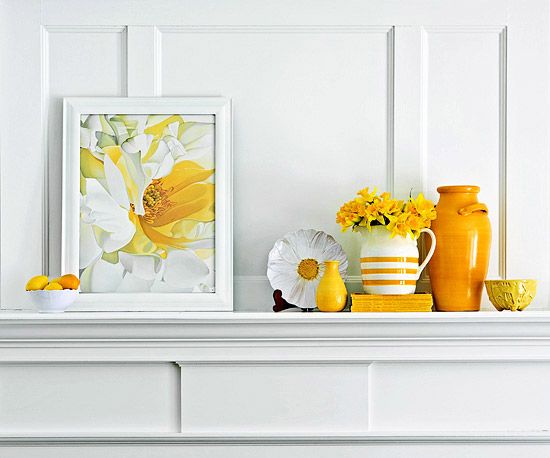
Similar to ‘tablescaping’ (an interior styling focused on creating mesmerising table settings), mantelscaping is focused on artfully arranging decorations above your fireplace. Whether you’re a maximalist or minimalist, mantelscaping is all about curating a collection of your favourite items and showcasing them with thoughtful use of both texture and colour. From books, artwork, and vases, to planters, candles and trinkets, your mantelpiece is a place to express yourself and an area to refresh your living space from season to season, or even week to week.
NO FIREPLACE?
Fear not. Mantelscaping works just as well on a sideboard, shelf, or any area against a wall. Ideally, this should be in a central position in your living area, not tucked away in a corner, and well lit.
HOW TO CREATE A MANTELSCAPE.
Feeling intrigued and what to create an inspiring and balanced mantelscape? Follow these tops tips:
1. When starting to plan a mantelscape, choose accessories with a common colour thread or pattern to create a cohesive look, whether that’s through the use of tone or decoration.
2. Choose items with varying height, shape and texture to add interest.
3. Remember the ‘rule of three’ styling trick for displaying your treasure trove of favourite things – always group items in odd numbers to create an arrangement that is visually more aesthetic.
4. Pay close attention to height. One suggestion is to stack books on your fireplace mantel to elevate smaller trinkets, so they don’t get lost amongst taller accessories. Adding various sized posy vases with stems of dried flowers is also a great way to incorporate colour and height.
5. Think about depth. Try propping mirrors or prints behind trinkets and plants to vary the composition.
6. Like everything in your home, ensure your mantel is a reflection of your personal taste, whether that’s pared-back or quirky.
Once you’ve finished styling the mantel of your dreams, take a step back to assess the balance and ensure you’re happy with it. Remember, you can tweak it as often as you like and swap in flowers or accessories for a fresh new look.
ISN’T THIS JUST A CHRISTMAS THING?
Mantelscaping isn’t just a festive trend. Importantly, it doesn’t matter what season it is because mantelscaping works well all year round and is just as much for Easter, Christmas and birthdays as it is for the everyday. For example, spring and summer are ideal for colourful flowers or trailing plants, in autumn introduce candles and burnt orange accents, and for the festive season go all out with a garland and twinkling LED lights.
This is a small area to reflect your personality and embrace new trends without having to overhaul an entire décor scheme. The space offers an opportunity to inject new aesthetics into a room and prevent it from becoming tired and dated. It’s good to change things up now and then and mantelscaping is a great way to do this with ease and on a more regular basis.
When it comes to winter and you’re lucky enough to have a mantelpiece, you can make it the crowning glory of a room by adorning it with greenery entwined with winter flowers. Ideally, you would use fresh foliage such as fragrant spruce, conifer branches or eucalyptus, but faux foliage also looks striking when combined with twinkling fairy lights and berries. Dried orange and pinecones make wonderful additions to your mantelpiece marvel too adding scent and contrasting textures. Styling your mantelpiece for winter will make it the striking focal point of a room and draw the admiring eyes (and praise) of visitors and family alike.
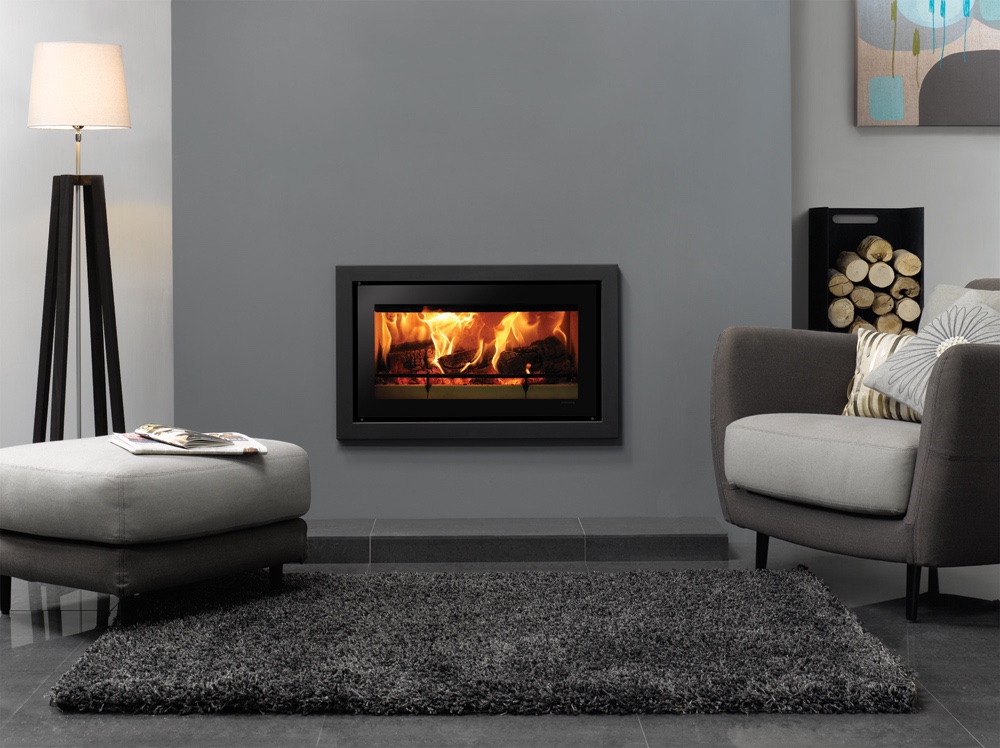
Take a walk on the soft side, that right, this week we’re talking all things rugs!
Tired of looking at bare floors? Want to sink your feet into a soft plush fabric instead? When it comes to adding comfort, texture and colour to your floors, one of the simplest ways to breathe new life into a room is to add a rug. Every cosy fireside needs a rug to lounge on in front of it but what should you be looking for when you’re shopping for one?
SAFETY
When shopping for a fireside rug the number one rule is to look for a guarantee that the rug is fire-resistant. Wood-burning fireplaces frequently pop and crackle, throwing small pieces of burning embers several feet out onto the floor. While ceramic and stone flooring won’t burn, carpeting and hardwood floors can catch fire.
With the inevitable sparks, embers and soot flying around, it’s important to consider the practicalities when choosing a hearth rug for beside your fire. Though no rug is completely fireproof, many include natural oils or coated materials that resist burning.
Hearthrugs are available in four different materials, nylon, olefin, wool or fiberglass.
Wool has extremely low levels of flammability and is naturally stain resistant. As a result, this is the most practical choice as not only is it cosy, it’s easy to clean and does not ignite easily.
Flying embers that land on a fibreglass rug will also burn out harmlessly and because they are vinyl-backed, fibreglass hearth rugs won’t slip or slide on a hardwood floor. These rugs are currently only available in solid neutral colours, which would match a modern decor.
Both nylon and olefin rugs are cheaper than the more expensive wool or fibreglass hearthrugs. You can find them in a range of patterns and colours for every decor style, from animal prints to sports-team themes.
SHAPE
Hearth rugs come in three basic shapes — rectangular, half-round and oval. Rectangular fireplace rugs sit flat against the straight edge of your hearth. Half-round fireplace rugs, which look like half a circle, also sit flat against the hearth and make the most of limited space whilst making a decorative statement. Oval fireplace rugs are frequently braided and would suit a country-style decor.
STLYE
No need to sweep your design goals under the rug, use this accessory to showcase your chosen style. Whether you like to practice yoga fireside or dance the nights away, there are rugs suited to every use.
It is important for a rug to complement the rest of the room just as any furniture or accessory would, which is why there is such a fantastic choice available. Plain rugs in bold colours can add a striking aesthetic and extra large rugs can add a big impression. Some home furnishings seem timeless in their appearance and manage to easily enhance the interior of any room effortlessly. Traditional rugs fall firmly into this category with subtle nods to oriental and Indian styles.
Whichever style of rug you select to decorate and furnish your home with, it will be sure to bring individuality, warmth and texture into the room.
RUGS ON TOUR
The styling doesn’t have to stop indoors either; soft yet durable, an outdoor rug can handle anything. Even a British summer. So, why not upgrade your outdoor living space and include a fireside rug in your design.
Great organisation and storage are key to making your home flow more efficiently. One item that is worth its weight in gold is a log holder or storage area. In Norway, woodpiles – called holz hausen, are something of an art form, built up and displayed in homes and gardens with pride. However, if not done properly, displaying logs can be hazardous. A purpose-built log store can help keep your home organised and safe.
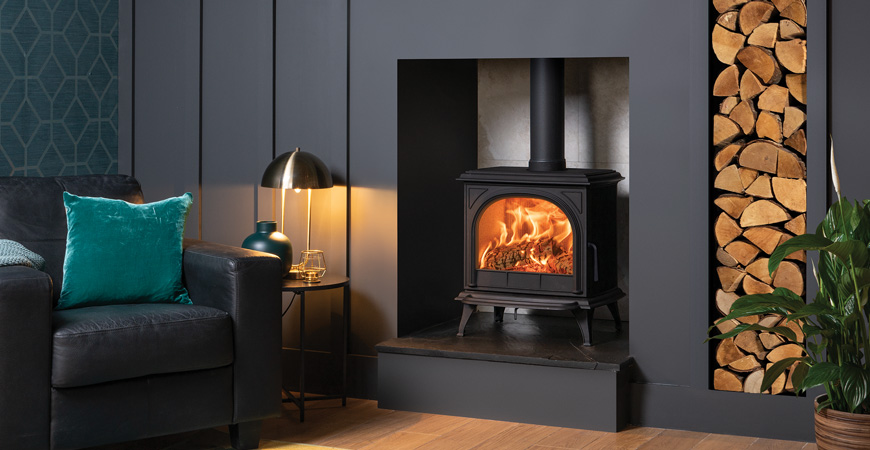
FIRES WITH LOG STORAGE
Many wood-burning stoves in our ranges come with the install option of a log store base or bench. The Vogue Midi T for example can be installed with the Midline log store base adding increased height and a convenient fuel storage area.
The Dovre Rock’s optional wood box base mount ties in seamlessly with the design of the stove making it a feature of the log store.
The Stovax Studio Air 2 Freestanding, is one of many stoves in the Stovax range that can be mounted on a Stovax stove bench. Not only does this create an exceptional view of the flames, but it also allows for attractive and adjacent log storage underneath. These steel benches create an adaptable alternative to hearth mounting and there are several sizes of bench available.
For those who’d prefer the wood was kept out of sight, Nordpies’ elegant Quadro Ecodesign wood-burning stoves also feature a handy built-in log store within their long body for easy refuelling.
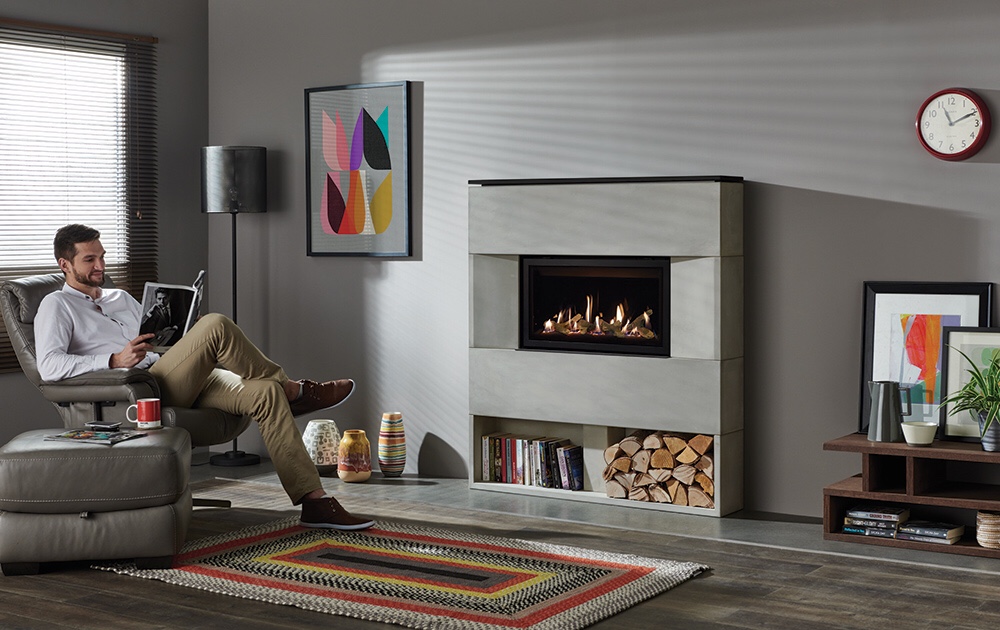
FIREPLACES AND WALLS WITH BUILT IN STORAGE
Creating a log storage area within your fireplace design is not only a handy way to store your logs but it can also add a wonderful aesthetic to your interior. Whether you chose to store your logs in an alcove adjacent to or under your fire, or even beneath built-in seating within the room, having them close by makes refuelling the stove a pleasure rather than a chore. No one enjoys having to wrap up and lug logs in from a cold, dark outside shed, even collecting supplies from another room can be an inconvenience when it means having to leave the cosy fireside!
There are many ways to incorporate a log wall or storage area into a fireplace design, from a long vertical stacking space to a geometric built-in cabinet. A log alcove is not only a handy place to store wood for fuel, but it also introduces some natural texture that is sure to complement the rest of your room, particularly in loft style and cottage core styled living spaces.
LOG HOLDERS
Stovax log holders are a brilliant addition to any log fire or wood stove and are ideal for both modern and traditional homes. Made from strong steel with solid construction and durability, Stovax log stores come with a 1-year guarantee and strength for both indoor and outside use. Available in a variety of sizes, the right choice and provide storage plenty of room to accommodate your firewood.
Available in both traditional and contemporary designs to suit the design of your home they are the perfect fireside companion. Ideally suited to those with a wood-burning fire or stove (without a log storage compartment) and for those who don’t want to incorporate a built-in storage area into their interior design.
The crescent-shaped log holder not only provides a decorative screen for your fire when not in use but also conveniently stores the wood next to your wood burner.
When it comes to decorating, one of the most important decisions you will make is what to hang above your fireplace. There are so many options it can be difficult to chose just one! Fireplaces are often the focal points of the rooms they reside in and this includes the space above them. It’s important to choose something that compliments your living space décor, is the right size and reflects your personality, it’s your home after all! In this article we look at some of the most popular ideas for fireplace décor to help inspire you.
MIRRORS
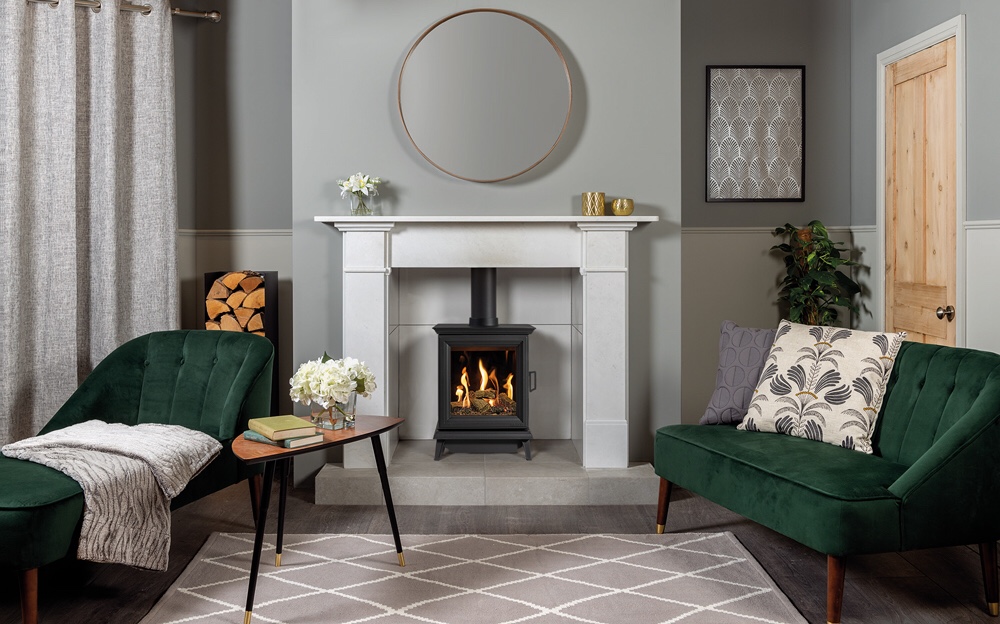
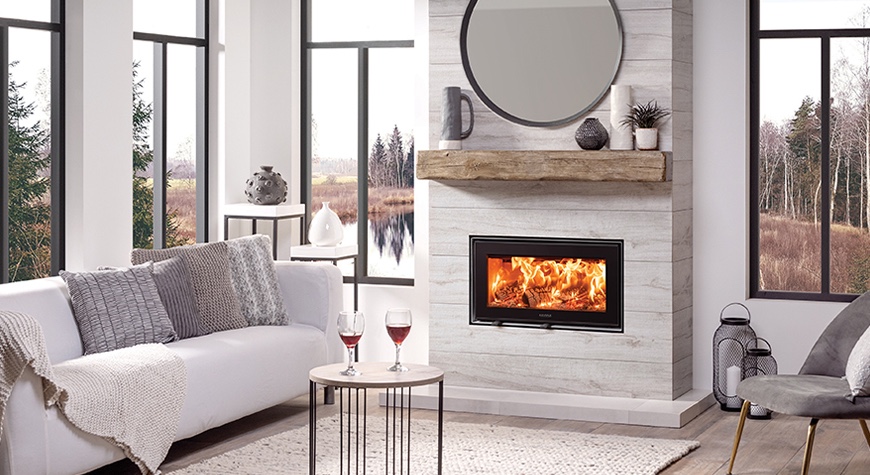
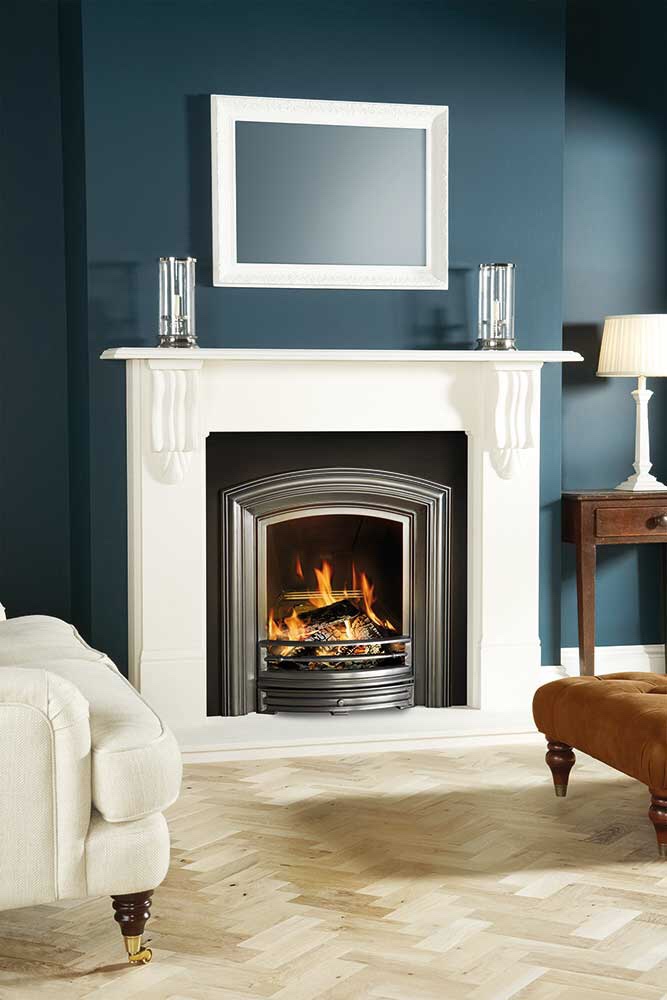
Hanging a large mirror above your fireplace is a classic way to decorate your mantel. Not only do mirrors add a touch of glamour, but they also create the illusion of a more open space. A traditional rectangular mirror in an ornate frame conveys luxury and elegance while a circular mirror with a minimal frame makes a more contemporary statement. Decide what works with your style and then supplement your mirror of choice with complementary items such as candles and vases.
You can learn more about hanging mirrors over mantels on our fully dedicated blog here: Mirrors Over Mantels
ART
You don’t need to be a fine art connoisseur to feature art you love in your home. Quirky phrases, abstract canvases and street art on skateboards will all work if you want them too!
Believe it or not it is perfectly safe to hang framed prints or art work above a fireplace. A solid mantel will do most of the protecting and the frame will do the rest. You may decide to use seasonal pictures when your fireplace is not being used but if you opt for an art piece that will be on permanent display try to hang it four to twelve inches above your mantel if space permits. Hanging them at around eye level, approximately 5 feet 6 inches from the ground will work best. The guideline for galleries is to place them at 60 inches from the floor to the centre of the painting.
Along with mirrors, if you decide to hang a large piece of art above your fireplace, its dimensions should fall between the width of the fireplace opening and the width of the mantel. Artwork above a fireplace tends to look best when the width f the artwork is larger than the opening of the fireplace but smaller than the overall width of the mantel.
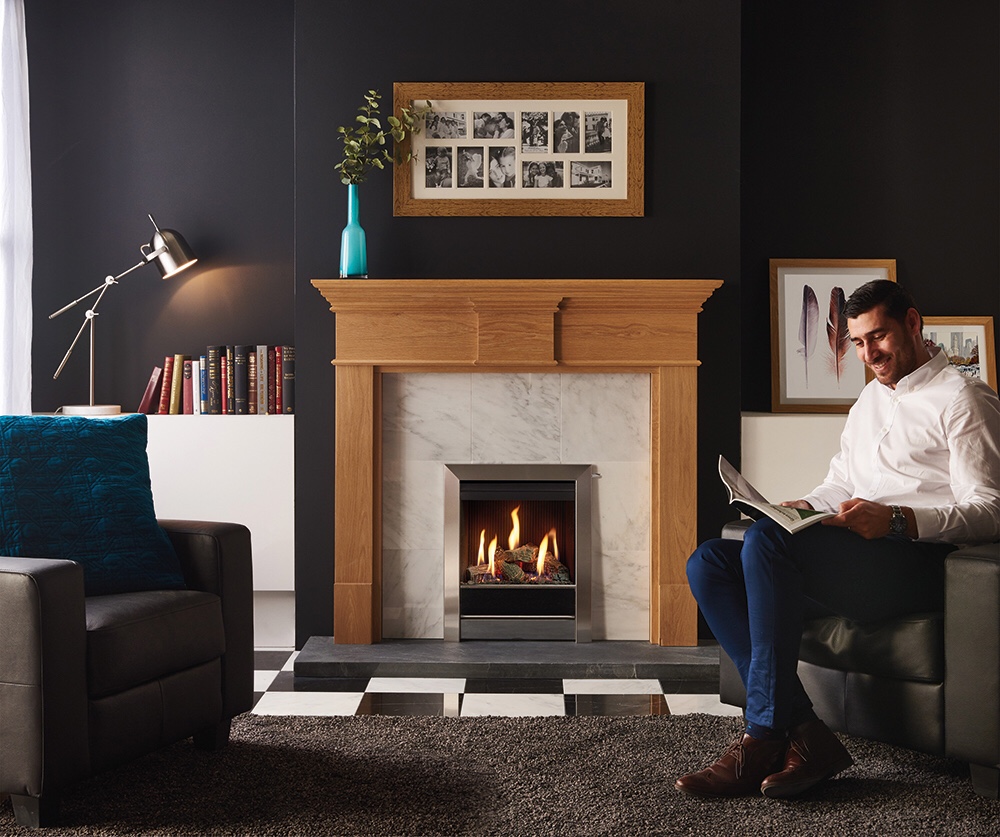
FAMILY PHOTOS
Your fireplace is the focal point for gatherings with family and friends, so it makes sense to display memories of those dearest to you. Family portraits or candid photos can be easily framed and hung above your mantel for all to see. Another method is having your pictures rest on the mantel, leaning against your fireplace. You can layer staggered photos this way to add some depth to your decor and include even more cherished moments in your display.
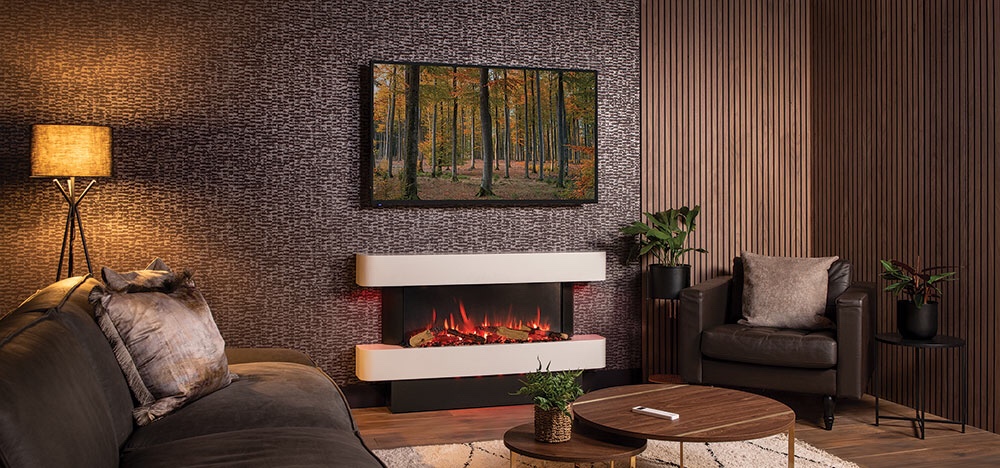
TELEVISION
For some, a TV over the fireplace may seem more practical than style-conscious, but when done right, a television can be a sleek and functional addition. You’ll also want to make sure your television is the right size. Your screen should be at least partially framed by the fireplace backsplash, but not dwarfed by it. Consolidate cords as much as possible for a clean look that will allow you to place a few accompanying decor accents on your mantel alternatively look at installing a media wall to house your fire and TV.
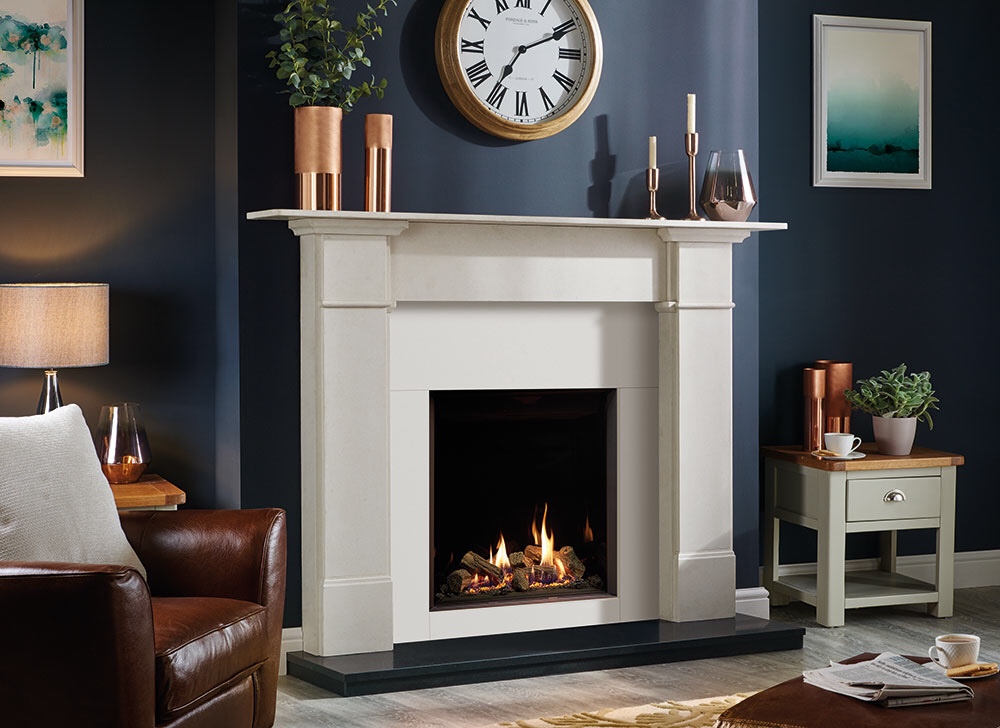
CLOCKS
A decorative wall clock makes a stylish and practical centrepiece for above your fireplace mantel. It’s always useful to have a clock in your main room, and decorative clocks are typically oversized, making it easier to tell the time from any angle or distance. They also come in a variety of decor styles, so you can browse a host of different materials and faces until you find the perfect one for your living space.
WREATHS
Not just for Christmas! Bring a touch of the outdoors inside with a decorative wreath. You can find an array of year-round wreath options online or get creative and make your own as a fun DIY project. Wreaths can be made from natural materials such as flexible twigs, olive branches, or lavender, or from manmade craft supplies such as twine or tulle. Dried flower wreaths on dark painted walls can make a beautiful statement piece. Centre your wreath over your fireplace for maximum effect.
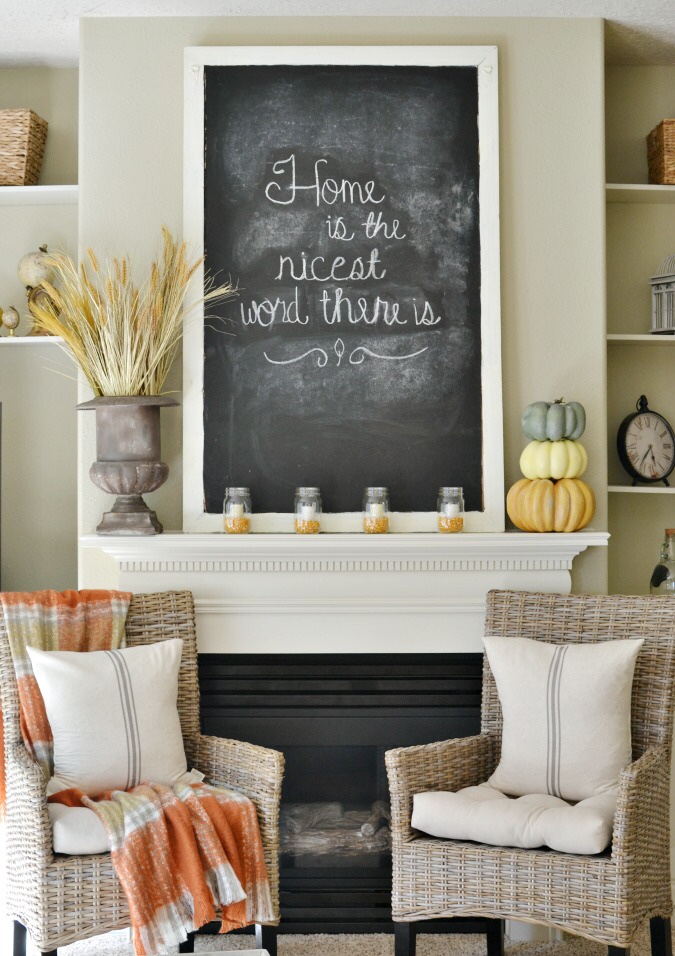
CHALKBOARDS
The distressed surface of a chalkboard is the perfect complement to a loft styled or cottagecore fireplace. It’s also a reusable surface that you can fill with cute sketches, the family motto, or your favourite quotes it’s also great for birthday messages or seasonal greetings! A chalkboard can be hung above the mantel or rest on top of it depending on size, keep in mind you will most likely be updating it fairly regularly so it needs to be hassle free to take down and pop back up.
Want that cosy glow without it costing the earth and any of the start-up or clean up hassle? If you’re looking for an alternative to a log burner, we examine the best options available.
ARE WOOD BURING STOVES THE BEST OPTION?
The log-burner has long been a fixture on many people’s home lust list; it’s comforting flicker, characterful charm and ability to quickly turn a room from chilly to toasty make them a hugely popular feature. In fact, an estimated one million households in the UK now have one.
However, wood burning stoves are not the right choice for everyone. Those living in smokeless zones are not permitted to fit one and some people feel they require too much maintenance when it comes to cleaning them out and ensuring a constant supply of firewood. While others have no chimney, or may have concerns about the environmental impact of a wood burning stove.
Although all wood-burning stoves manufactured and sold in the UK must now be Ecodesign standard, meeting strict European requirements on low emissions, thankfully there are alternatives that mean you won’t even need to consider log storage or particle pollution.
If you can’t imagine your perfect home without a stove you’ll be delighted to know that is it is still possible to create a snug, warm and cosy home without a wood burner, and our round up of the best wood burning stove alternatives will ensure the flames you desire are still within your reach.
WHAT ARE THE ALTERNATIVES TO WOOD BURNING STOVES?
If you have decided that a traditional wood burning stove is not the right option for you, just what are the alternatives? We supply two options: gas and electric.
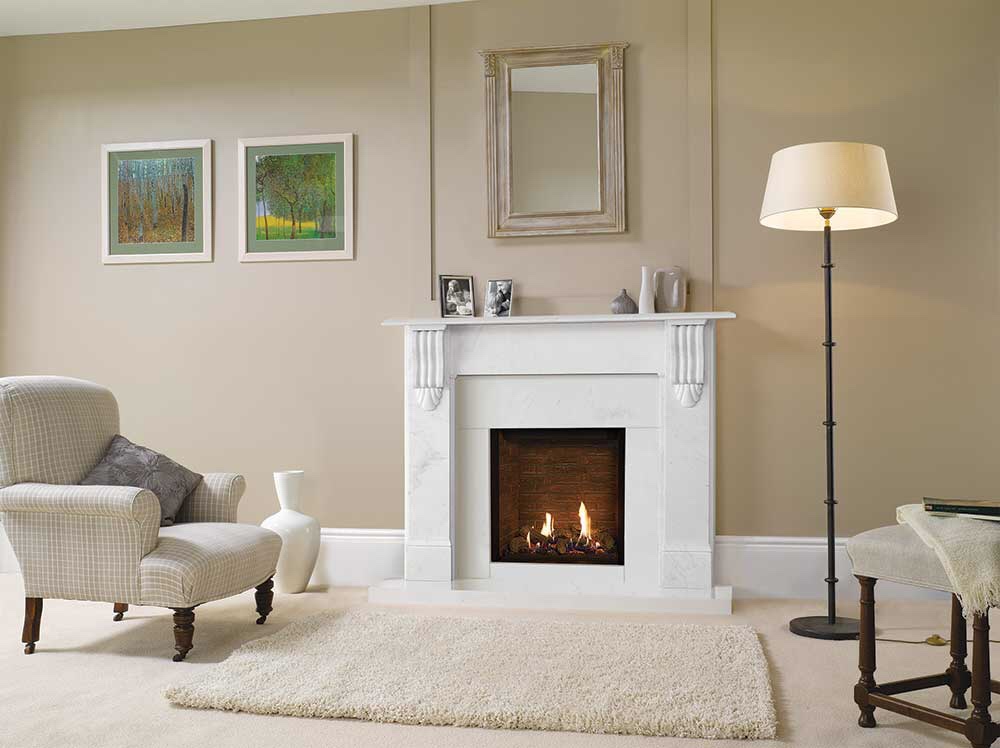
WHY CHOOSE A GAS FIRE?
Gas fires offer the same warmth and flickering flame as log burners and come in a huge range of styles to suit your home – from classic and sturdy to sleek, modernist works of art. With no ash or sooty deposits to clean up, they’re a great option for those wanting a hands-off stove experience – plus the top models can often be controlled via remote control from the comfort of your sofa.
While you won’t need to order and buy logs for this option, you will need a gas supply. On the downside, if it’s the gentle crackle and woody smell of logs burning you are craving, then you might be disappointed. You should also note that even though no chimney is required for a gas stove, you will need adequate ventilation. Finally, a gas fire installation requires the services of a Gas Safe registered engineer in order to comply with regulations.
Gas fire: pros and cons + Cosy flickering flame effect + Range of styles to fit your home + Easy to maintain and control + Cheaper to run than an electric fire – Requires adequate ventilation – No wood-burning crackle or smell
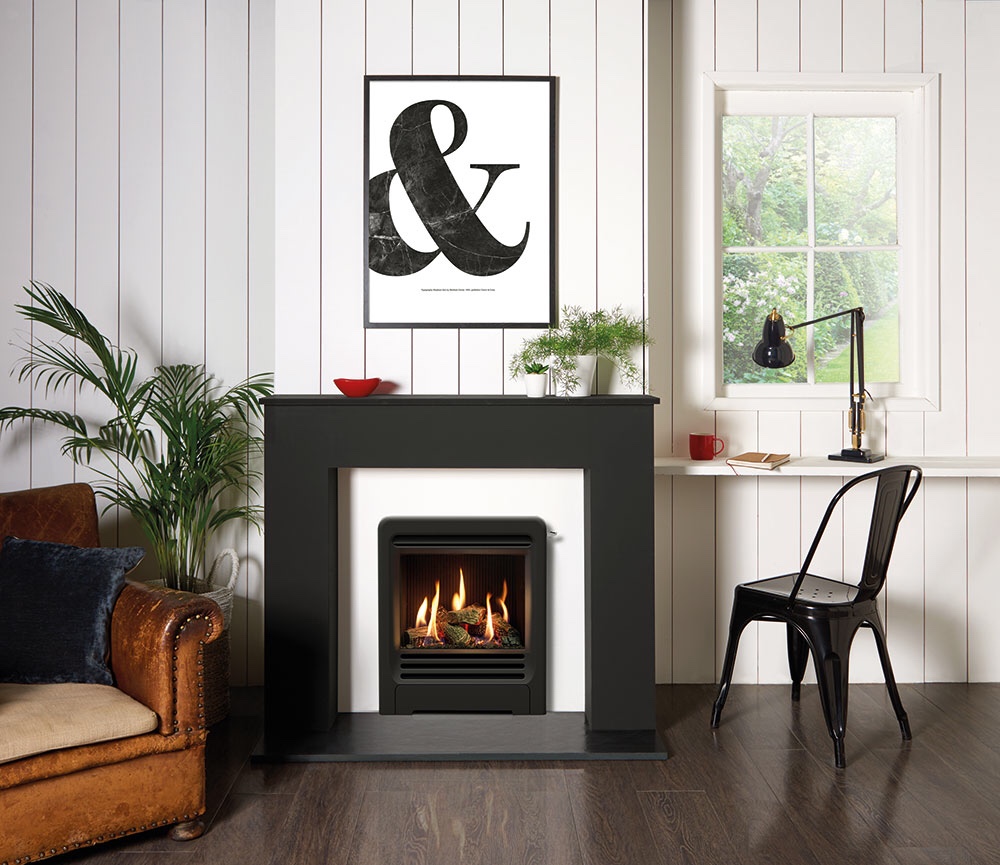
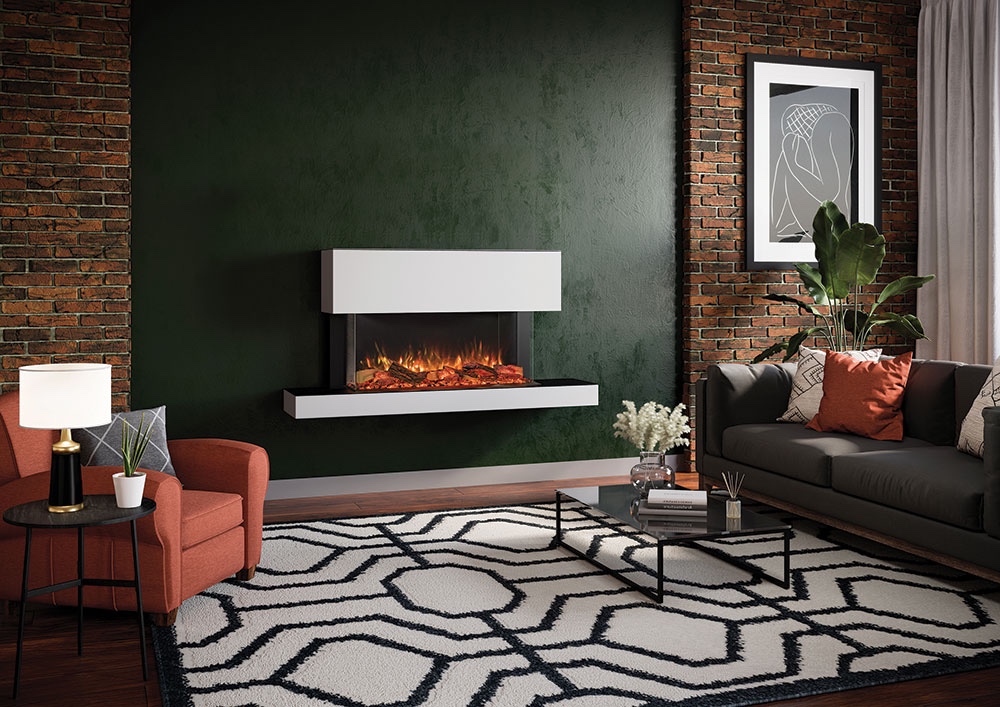
WHY CHOOSE AN ELECTRIC FIRE?
Electric stoves are easy to install (connected to your mains electricity supply), require no chimney and are maintenance-free, plus they are one of the more cost-effective types of fire to buy.
However, there are disadvantages with electric fires to consider. They do not produce real flames (though this is much safer if you have children or pets) and even though there are some fairly realistic flame effects out there, it’s hard to beat the real thing. Then there is the fact that they become redundant should you experience a power cut.
If you’re looking for a winter warmer, they do not give off the same levels of heat as gas or wood burning stoves – most electric fires and stoves are limited to just 2kW or less.
Electric fire: pros and cons + Cheapest to buy and easiest to install + No smoke, fumes or mess + Simple to use and control + No chimney or ventilation required – Not as much heat as the alternatives – Fewer style options than gas fires – No wood-burning crackle or smell
WOOD BURNING STOVE ALTERNATIVES: OUR CONCLUSION
While electric fires are the most cost-effective option, they’re also the least powerful as a primary heat source. For the most number of boxes ticked as the closest alternative to a wood burning stove, it has to be the good old gas fire. Available in a range of attractive styles and offering a cosy living flame and serious room-filling warmth as and when you need it, the only thing missing is the unmistakable crackle only a wood burning stove can give you.
8th March 2022 marks this year’s International Women’s Day, a worldwide celebration of women’s rights and celebrating the social, economic, cultural and political achievements of women.
March 1 through March 31 also marks the celebration of Women’s History Month. This month-long celebration is designed to pay tribute to the “generations of women whose commitment to nature and the planet have proved invaluable to society.”
Throughout the course of history, women have played an integral role in the development of technology. Today we’d like to take a moment to shine the spotlight on one women in particular whose invention changed the way we live and has saved the lives of thousands.
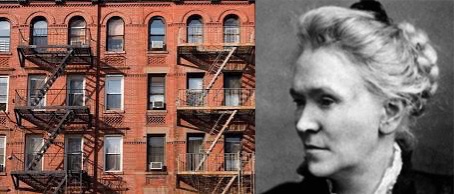
Anna Connelly, Inventor of the Fire Escape.
Did you know that modern fire escapes owe their existence to a woman? At a time before women were permitted to vote or even work outside the home, Anna Connelly of Philadelphia was one of the first women to submit an idea to the patent office.
In 1887, in an effort to prevent the deaths of many living in multi-story buildings, American inventor Anna Connelly patented the first steel exterior fire escape, predecessor of the modern fire escape.
She was one of the first women to register a patent for an invention after the Civil War, when women were finally allowed to file patents for themselves. Connelly’s design was a revolutionary way to make buildings safer by adding an exterior staircase that prevented people from falling several stories down a flight of stairs in the panic of an emergency.
This invention was technically known as a fire escape bridge that was surrounded by railings and with openings at the ends; the bridge type structure would connect adjacent buildings at the roof line. If a fire broke out and people could get to the top of the building, they could escape across the bridge to safety to the building next door, the steel or iron railings along the sides prevented people from slipping or falling off in panic.
This extract from Connelly’s patent details her idea,
‘My invention relates to improvements in fire-escapes; and it consists of a bridge surrounded by a railing and having openings in the ends of the floor thereof, as herein described, the said bridge being adapted to be placed on the roofs of adjoining or adjacent buildings, thereby permitting the ready and safe passage from one roof to the other.’
Connelly’s design was also a very cost effective strategy for improving public safety. Because the staircases were added to the exterior of the building, there was no need for costly building remodeling. Her invention led to the first building codes in New York City requiring a second means of egress for people to escape buildings in an emergency.
Anna Connelly, one of America’s first female inventors, is directly responsible for saving the lives of thousands of people for nearly 150 years. Little else is known about her, according to records she had been filing patents since 1877, but the fire escape bridge is her most valuable contribution. Like many other women inventors, her name is only mentioned briefly in history.
For many homeowners, the fireplace is often one of the epicentres of the home where they spend a lot of time. The idea of hanging a mirror above it is to enhance the positive features. We’ve put together 5 top tips to help you choose and hang your mirror (s) in the most effective way over your fireplace.
IS IT OK TO PUT A MIRROR ABOVE A FIREPLACE?
So, first things first, absolutely! We’ve been doing this for hundreds of years, and the design of mirrors has improved tremendously over that time. Mirrors above the fireplace are a timeless décor strategy.
ROUND, SQUARE OR SHAPED MIRROR?
The first choice when selecting a mirror for over your fireplace is its shape. When considering the shape of your mirror, think about the other elements in your space. If your furnishings have many straight lines and minimal details, soften and balance out the hard angles with a round mirror. Circular styles look particularly stylish above a fireplace, where the curves of the mirror contrast with the straight lines of the mantel. If you’re looking to create more of a statement, choose a classic, strong rectangle that will add instant depth and interest. You can also play with grouping a collection of mirrors in different shapes for a vivid display. Two or three simple square mirrors with different yet co-ordinated frames (e.g. painted in the same colour) can make a dazzling display in any size of room.
HOW BIG SHOULD A MIRROR BE OVER A FIRE PLACE?
The next point to think about is how big your mirror should be. When it comes to sizing a single mirror for above a fireplace, look for something that adequately fills the space between the top of the mantel and the ceiling. A key guide to choosing a size for your mirror is to follow the ‘rule of thirds’ whereby you take the height of your mantel piece, double it, and you have the ideal height that the top of your mirror should be hung at. The width of the mirror should never be wider than the mantelpiece or fireplace.
A large mirror above the fireplace makes that area of the wall disappear, reflecting back the features in front of it. A plain mirror with a bevelled edge or simple, narrow frame makes a good choice for a small room. Hanging the largest size that will fit over the fireplace offers an unbroken image to visually enlarge the space.
FRAMED OR UNFRAMED?
Adding a frame around a mirror enhances the visual appeal of the space and can help to tie it in nicely with any décor themes. You can also use rustic mirrors which add a lot of texture and warmth to interiors. Framed mirrors come in all shapes, sizes and colour meaning there’s one suited to complement any space.
HOW HIGH CAN YOU GO?
Don’t position the mirror too high or hang it on a tilt. Avoid positioning the mirror too high over the fireplace so it can’t be used functionally. Placing it too high means it could be reflecting the ceiling, a bare wall, a doorway etc which makes for awkward viewing angles. But, depending on the thickness of the frame, you can hang your mirror higher so that you don’t get a dark shadow cast on your décor.
Hanging a mirror a few inches above the mantle helps in reflecting the decorative items places on or over it. When a mirror is hung over the centre of the mantel you can place accessories like scented candles either side of it.
HANGING YOUR MIRROR
The hardware needed to attach a mirror securely must be chosen depending on the weight of the mirror and the type of wall behind it. For dry wall, you can hand a mirror on ‘J’ hooks, and for a brick wall, you can hang the mirror by drilling holes into it and inserting plastic or metal anchors into the holes.
A top tip is to also attach felt pads to the wooden frame on the back of the mirror. This technique helps avoid dark marks on the wall that can be left behind when the mirror is taken down.
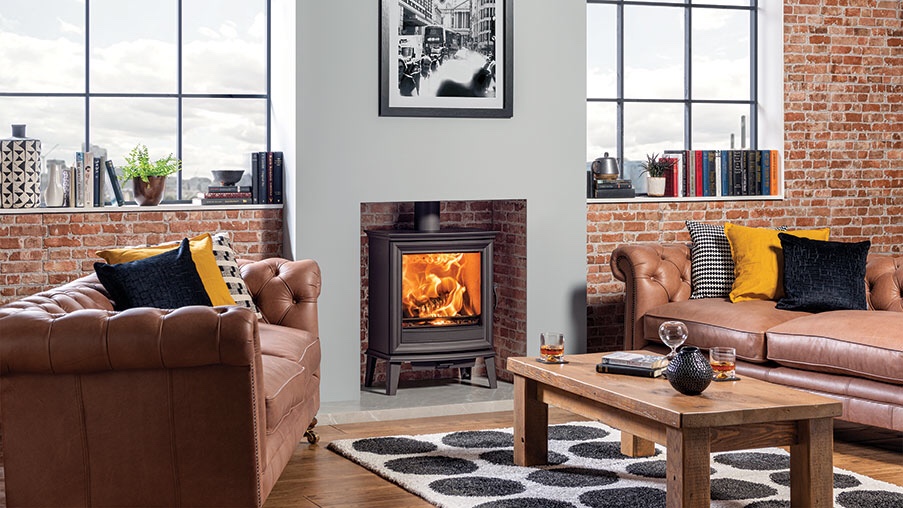
Love it or hate it, the exposed brick wall is making a come-back and it’s here to stay. Brick walls and modern interiors have been at odds with each other for a number of years but the rise of cottage core and loft style have inspired a new-found appreciation for the humble brick. We thought we’d seen the heyday of exposed brick walls but architects and homeowners alike have been gravitating to this growing trend to install unique character and timeless charm; we love the warm texture it brings into design schemes.
Exposed brick wall ideas can be a controversial design choice, it’s a bit of a marmite element in the interior design world. Some love them for their rustic warmth and texture. Others see a dusty building material and would opt for the finish of a plastered wall over it in any situation! For some the exposed brick wall in the living room is an expression of the rich and historical past of the building and a blend of the past and the present. For others, it’s a way to add elegance and personality to an otherwise boring interior dominated by glass and stone.
So why the sudden surge in popularity? Like many trends, the growth stems from our childhood memories and the increasing movement for spaces to feel familiar and welcoming. Everyone, from Grandma to your nephew, knows what a brick is and how it’s used. From an early age, we are pre-programmed to recognise that houses are built from brick especially in the UK. Some of the first toys we play with as children are building bricks and this creates a core memory and association which we never really remove. Team this with the surge in nostalgia being used in design and it’s easy to see why the exposed brick wall is back. As human beings, we thrive on having emotions and time attached to products and the truth is brickwork offers a comforting and natural ambiance which is hard to replicate in any other material.
Using any 3D wall covering, like bricks or stone, helps create a story for your interior, it adds interest and history. Texture on walls can help creates a true focal point, particularly around fireplaces and in new-builds where there are less features such as alcoves and chimney breasts. It also allows you play with other surface elements to complement or contrast against the colour and patterns of the wall. You can create fantastic juxtaposition in a space by mixing industrial elements, like brick and polished concrete, with chic fittings such as chandeliers and luxurious rugs.
Many people worry about the risk of dust from an exposed brick wall or the thought of them attracting dirt. If you decide to expose or install a brick wall in your home, ensure that you brush it with sealant as bricks are naturally porous which can lead them to crumble over time.
You may, of course, live somewhere that doesn’t have a natural brick wall. Don’t worry! There are tons of faux-brick options that allow you to perfectly stylise your space. From wallpapers to brick slips (thin tile like bricks), there’s an option for every room.