How to Create the Perfect Outdoor Living Space

21st June, the magical date when summer officially begins in the UK. Time to get set for lazy days in the garden and making the most of your outdoor space.

Even the tiniest plot has big potential for summer living whether it’s a balcony, a patio or a tiny patch of lawn. Your garden doesn’t need to be the size of a football pitch to create an outdoor oasis. From vertical planters and herb towers to innovative seating solutions, no matter what size your space is here are some great ideas to help you maximize it’s impact and make it you own.

GET COMFY

You’ve opened up the shed, worked your way through the cobwebs and finally found the furniture. With any luck all it will need is a dust down and it will be ready for action! If looking a little worn, wooden furniture can be given a quick makeover with a lick of paint and some new snazzy cushions. Dare to be bold and add a pop of colour, the brighter the better!

If, however, you’re in need of some new outdoor furniture here’s our top tips on selecting what’s best for your space. Furnishing a small area can be tricky, it pays to think of the big picture, planning carefully to create a functional area with breathing space. Armchairs with

side tables will give the most flexibility for dining, entertaining and lounging without dominating in the way that larger pieces can. Stackable or folding, slimline seating it a great option that won’t take up too much of your valuable outdoor space either. Team your seating with garden cushions and soft blankets in either a bold accent colour or tones of green, for an up-to-date and stylish look to suit your tastes.

SET THE SCENE

Paint walls and fences to create a seamless boundary. Dark grey, dark green and black make dramatically stylish backgrounds for bright furniture and vibrant planting in a suntrap but a cooler, darker space may need a paler, warmer tone to see off any chill. In all spaces, think about texture and height. Going high with planting and climbers creates natural privacy and has the potential to add scent in summer if you chose fragrant plants such as honeysuckle or jasmine. 

Pots and planters are a wonderful accessory for your outdoor space. You can move them around, create areas and screens, you can even add a herb planter near your barbeque spot – both aesthetically delightful and practical. It doesn’t take up much room, it’s full of texture, fragrantand great for summer dining – so much nicer to be able to grab a handful fresh herbs as and when you need them. 
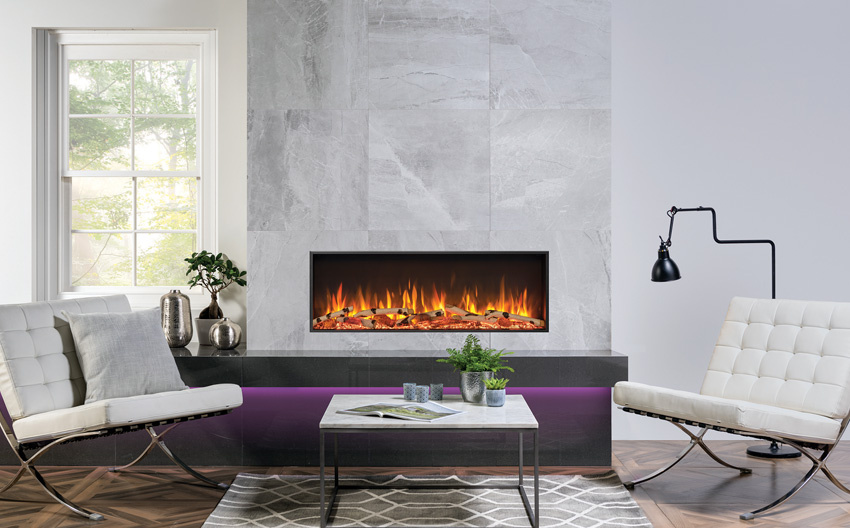
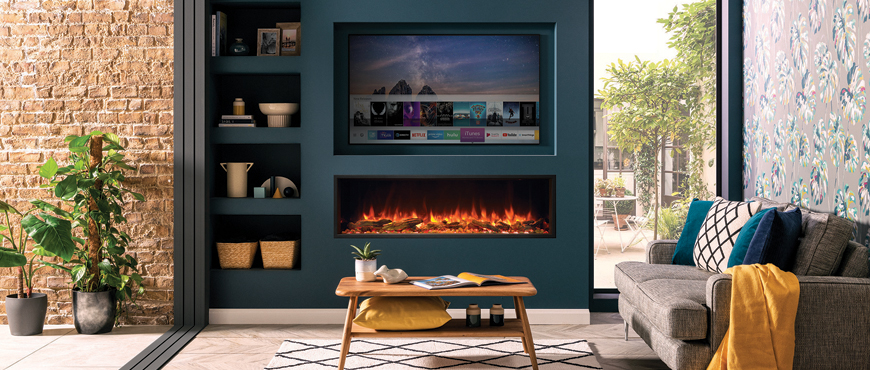
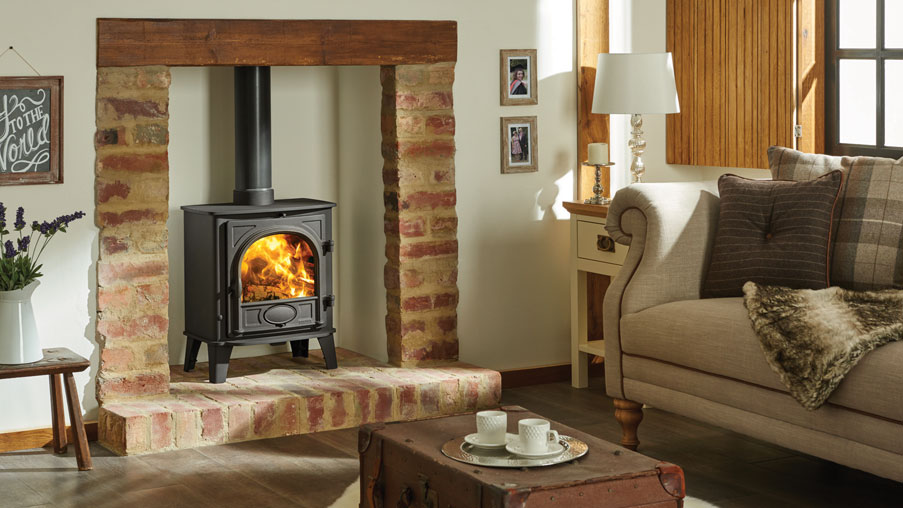
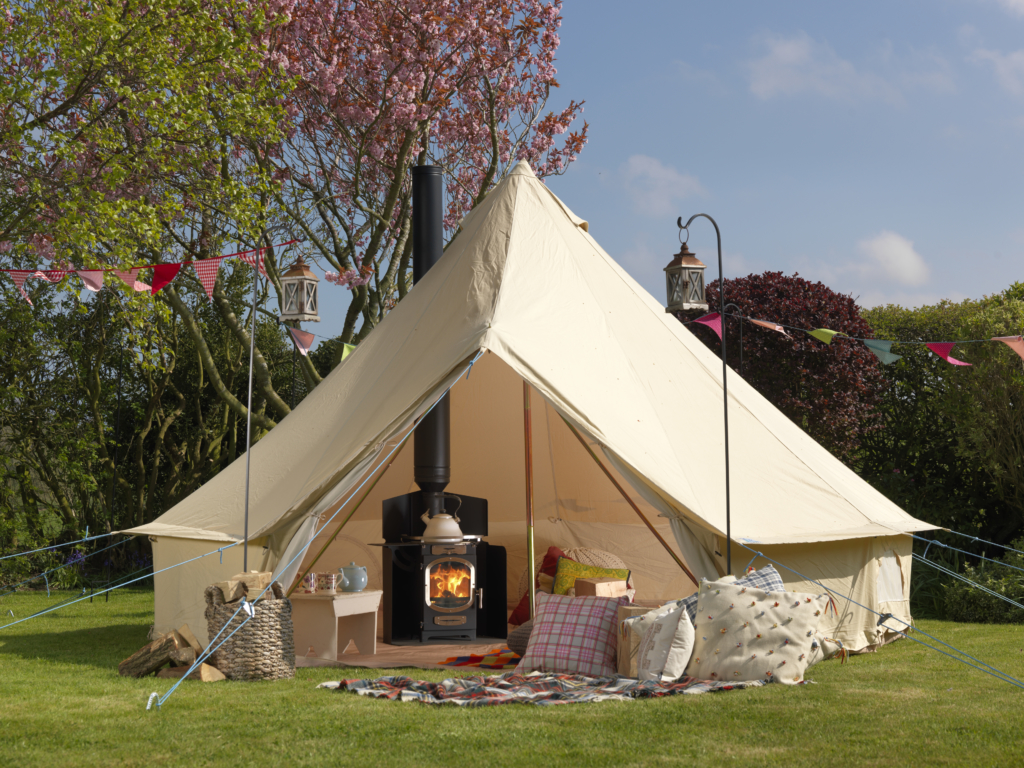
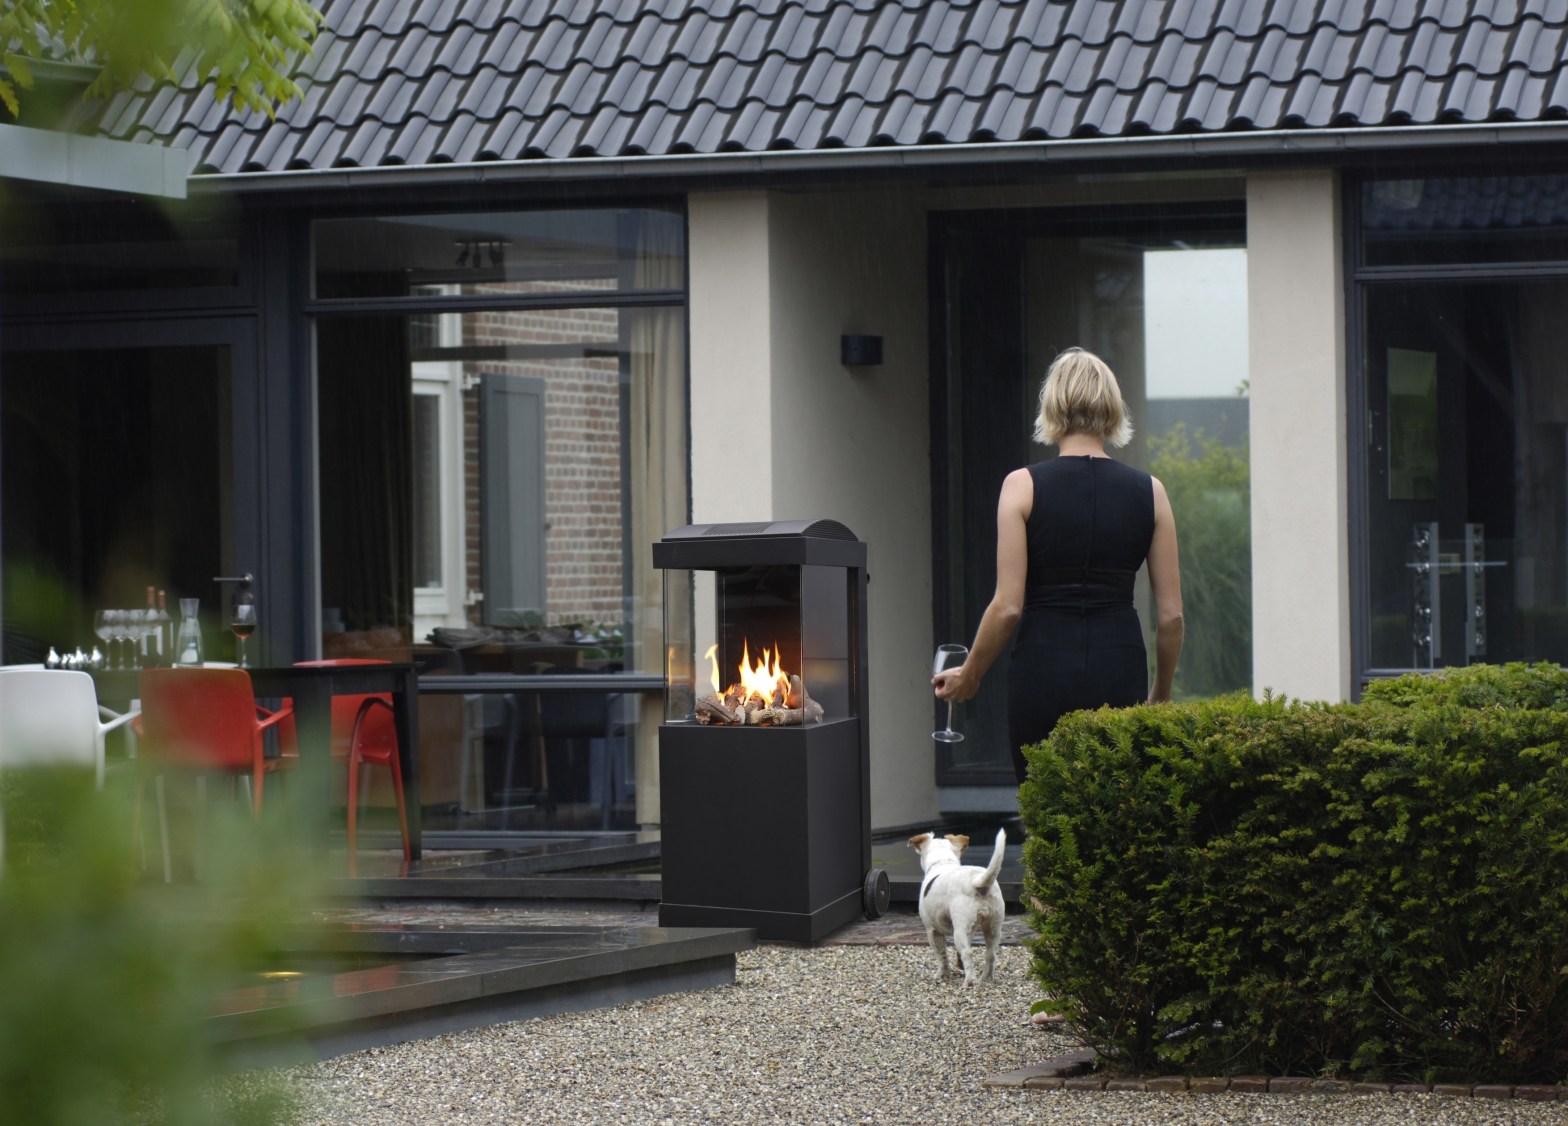
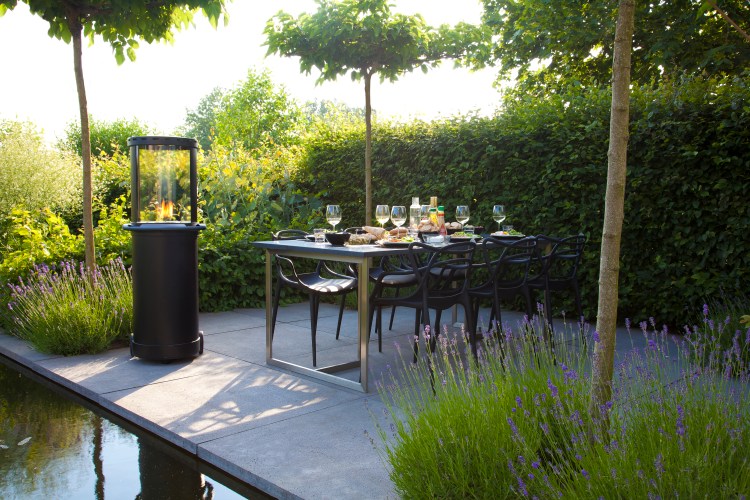
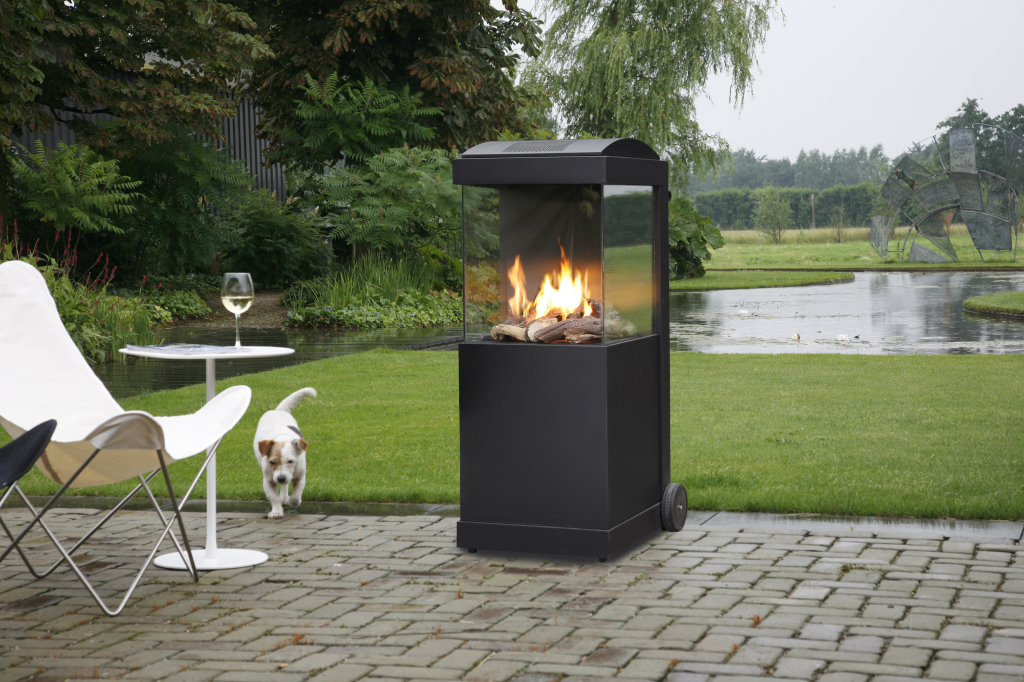
TURN UP THE HEAT

Welcome family and friends around the table again with one of our outdoor fires keeping everyone warm and comfortable. As they radiate heat not only are they a great insect repellant, but everyone will naturally gravitate to the inviting fireplace where they can extend their outdoor enjoyment into the night. An absolute must have accessory for any barbeque, outdoor celebration or gathering! Portable, stylish and easy to store when not in use. Check out our great selection of outdoor fires here: CLICK HERE

SWITCH ON THE LIGHTS

Add some outdoor lights, perhaps a lit water feature if you like the sound, and settle back into your own little patch of paradise as the days extend into the evening. Festoon lights and solar lamps will give your space a real feel of a living room outdoors.

PREPARE TO ENTERTAIN

There’s so much catching up to do! Cherish every moment and turn your garden into your favourite restaurant. Coordinate your tableware with your garden accessories, from the pitchers to the picnicware, make it fun. We can’t resist a quirky glass or plate!

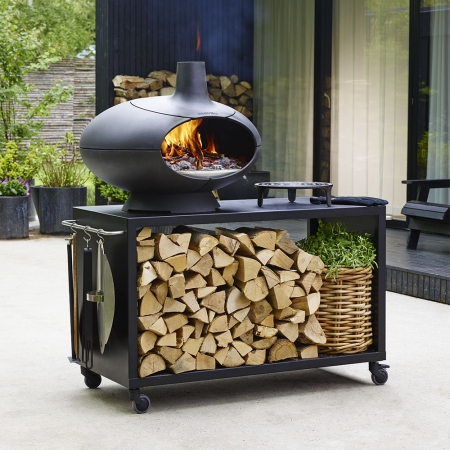
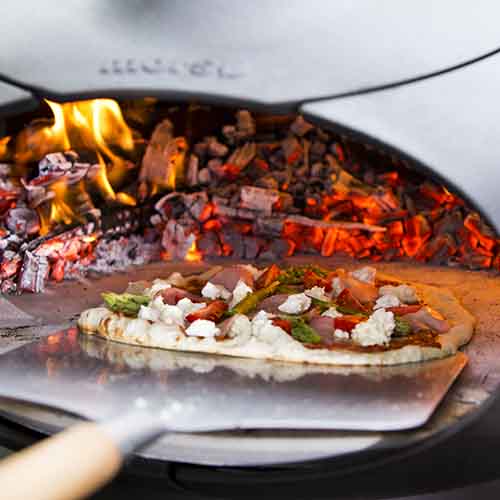
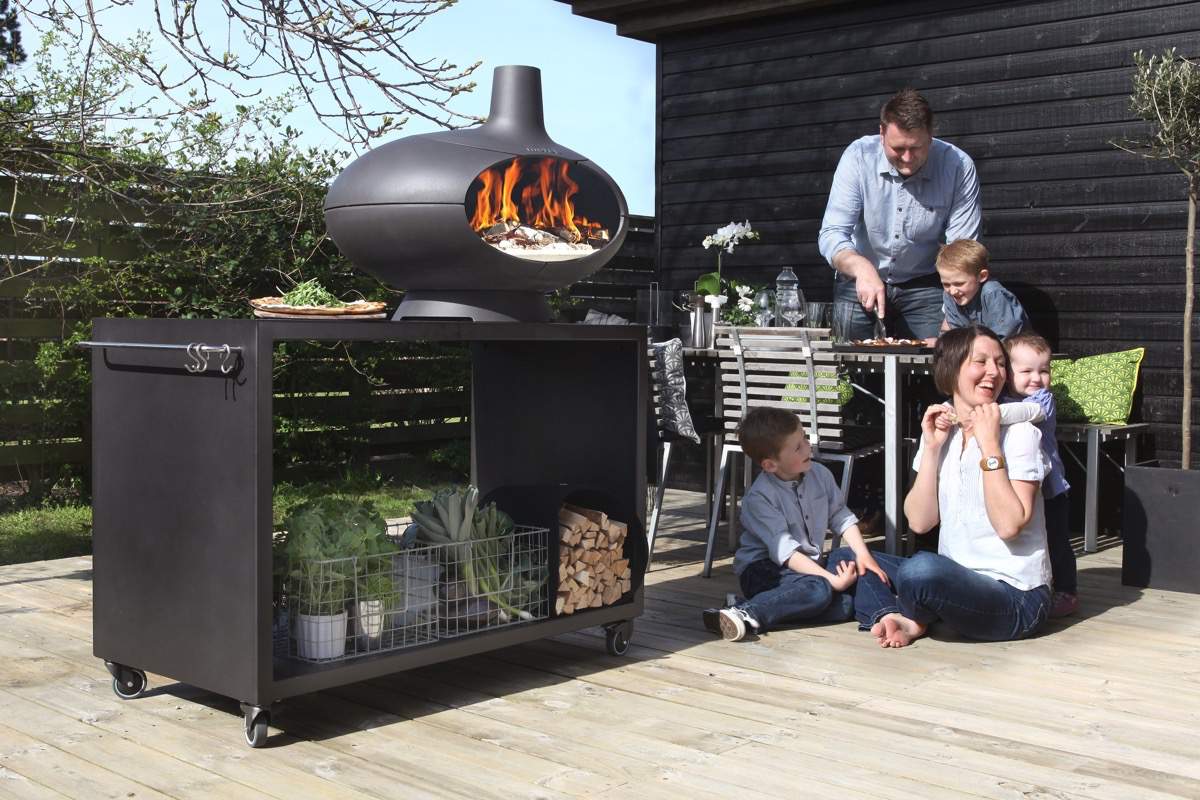
For the main event, why not consider a pizza oven for your outdoor space. If you’re dreaming of eating alfresco dinners but not a fan of BBQ food then a pizza oven really could be for you and your family. Pizza ovens have the ability to turn any meal into an occasion. Fun, authentic delicious pizzas with unbeatable flavour and a great entertainer for kids and guests with everyone wanting a slice of the action! 

Read more about why a pizza oven might be ideal for your summer garden here: Pizza Ovens

And if your looking for some great garden activities we’ve got that covered too: 5 Ideas for Entertaining Outside Round Your Fire

How to Make and Cook Sausage Rolls in Your Pizza Oven

5th June officially marks Sausage Roll Day! And we couldn’t think of a better way to celebrate this occasion than stoking up the pizza oven and cooking up some of these iconic British delights!

Yup, you heard us right! You can cook these ever popular pastry treats in a pizza oven! Cooking the pastry in a wood-fired oven really puffs them up and they’re a great party piece any time of the year. It’s still a bit of a secret, but there’s so much more than pizza you can cook in a pizza oven!

The recipe below creates a selection of artisan spiced sausage rolls, these additional ingredients can be omitted (cheese, marmalade, mustard, chutney, seeds) in favour of more traditional sausage rolls.

WHAT YOU’LL NEED

Equipment:

A pizza oven with door

Baking sheet/tray

Baking parchment

A clean surface to work on

Sausage Roll Ingredients:

700g sausage-meat

2 sheets ready-made puff pastry

50g Parmesan cheese, grated

About 1tbsp orange marmalade

Roughly 1tbsp grain mustard

1tbsp fruit chutney

1 egg beaten

A few sesame seeds

Flour for dusting

THE METHOD

Step 1:

Fire up your pizza oven and clear out any embers once it’s well heated. Then pop on the door to allow the heat to stabilize. You want it to be around a 3 1/2 Mississippi temperature for cooking the sausage rolls. If you’re new to pizza oven cooking this YouTube video explains the Mississippi technique to tell the temperature in your pizza oven : CLICK HERE

Let the oven stabilise for around 15-20 minutes while you sort out the sausage rolls.

The door wants to sit snugly in the oven entrance, you don’t need to worry about smoke escaping as the embers are all out of the oven.

Step 2:

Divide the sausage meat into 4 and roll them out into sausages as long as the pastry. Roll lightly in flour to stop them sticking.

Step 3:

Roll out the 2 pieces of puff pastry so they are a bit wider than the rectangle they come in. Cut each rectangle in half lengthways. Put one of the sausage-meat rolls on each piece of pastry.

Step 4:

Brush the long edges of the pastry with water and put one of the ingredients – Parmesan, mustard, orange marmalade, chutney – along each of the pastry rectangles.

Step 5:

Seal the pastry edges together and roll so that the seam is underneath. Brush each sausage roll with the beaten egg, sprinkle over some sesame seeds, prick or slash the top and then cut into 3-4cm sausage rolls.

Step 6:

Put on a baking sheet lined with baking parchment and put them in the oven.

Bake the sausage rolls until the pastry is well puffed up and golden brown and the sausage meat is at least 68C when tested with a probe thermometer. About 10-12 minutes.

Step 7:

Take the sausage rolls out of the oven and cool slightly before serving.

This recipe has been adapted from a recipe published on Manna From Devon Cooking School’s #woodfiredweekly blog. For more great recipes please check out their inspirational page or have a look at our Top 5 Morsø Forno Recipes here.

Introducing the Brand New Gazco eStudio Electric Fire Collection.

New for 2021, this stunning designer collection from Gazco combines cutting-edge technology, with stunning flame effects. Perfect for media wall installations eStudio fires are not only stylish, ultra-realistic electric fires but they also boast a versatile, fit-anywhere format.

We’ll break it down, feature by feature, so you can see just why we’re so excited to be offering this just launched new collection.

ENCHANTING FLAME VISUALS

The eStudio electric fire range combines striking LED flame visuals with highly realistic fuel effects to create an eye-catching centrepiece in any setting. The eStudio’s flame effects can be customised to suit your mood, with three different combinations of varying tones and five intensity settings. Choose from a vibrant flame picture that casts a rich glow over a darkened room, or opt for some background ambience – great for when you’re watching a movie.

IMMERSIVE EMBER BED UP-LIGHTING

Bringing the fire to life, the eStudio’s Chromalight up-lighting system shines through the fuel bed and illuminates the log-effects from below. In addition to a natural amber glow, the eStudio’s up-lighting can be set to a range of different colours or the gradually changing Spectrum mode which transitions through each.

A CHOICE OF TRUE-TO-LIFE, GLOWING LOGS

For the utmost realism, sections of the log-effects glow when the fire’s Chromalight flames and ember bed are activated, just like real burning logs. All eStudio sizes come with a hand detailed log-effect but if you’re looking for something a little different the fire can be upgraded with optional Silver Birch log-effects, creating an alternative but equally captivating display.

DYNAMIC EMBER EFFECTS

To create the illusion of a real embers, the eStudio’s fuel bed is made up of blackened glass media, dusted with a realistic ash-like coating. When lit from below by the eStudio’s Chromalight systems, the fuel bed’s media glows and darkens in different areas, seemingly at random, for a ‘living’ ember look.

THERMOSTATIC HEATING

The eStudio features a 2kW thermostatic heating system, which can be programmed to warm your living room to a pre-set temperature. This ‘set and forget’ heating function lets you enjoy your eStudio’s visuals whilst the fire manages the heat. You can also turn off the heating system completely and enjoy the eStudio’s flame and lighting effects without any heat at all, if desired.

COMPLETE CONTROL

For quick and convenient control, this advanced electric fire comes with a Thermostatic Eco handset. This easy to use remote control puts the eStudio’s palette of visual effects at your fingertips. Adjust flames, up-lighting, and the eStudio’s optional LED Mood Lighting System without getting up. Featuring a thermostatic sensor, the Eco handset also gives you the freedom to set your desired ambient room temperature as well as program your eStudio for daily or weekly heating schedules.

OPTIONAL ATMOSPHERIC MOOD LIGHTING

In addition to the multiple flame effects and vibrant Chromalight up-lighting, the option to upgrade the eStudio with the LED Mood Lighting System extends its ability to create the ultimate ambience. Featuring the same 13 Chromalight colours as the eStudio fire itself, and all controllable via the with the fire’s Eco handset, the versatile Mood Lighting System can be placed almost anywhere you see fit and is a favourite for feature media wall installations. Position the flexible LED strip around the fire, under shelves, or even around a TV to provide atmospheric mood lighting.

SIZES

Presented in three sizes, 85r / 105r / 135r, these innovative, contemporary built-in electric fires feature a versatile design all offering up to 2kW of programmable heating.

OVERVIEW

With their mesmerising flame visuals, ultra-realistic hypnotising glowing ember and log-effects, and versatile design for easy installation, the Gazco eStudio collection offers some of the most enchanting inset electric fires available. Delivering atmosphere to your living room at the touch of a button.

  • Life-like, glowing ember bed
  • 13 fuel bed up-lighting colours and Spectrum Mode
  • Glowing, realistic log-effects
  • Optional Silver Birch log set
  • Programmable Thermostatic Eco Remote Control
  • Flame and fuel effect lighting can be enjoyed without heat
  • Ecodesign Energy Saving Features
  • Optional LED Mood Lighting System

Media Walls Explained

If you like to keep up with the latest popular interior ideas, you’ll be no stranger to the media feature wall trend that has recently been storming social media and the world of interior design. Whilst feature walls have been around for some time, media feature walls (often just called media walls) are a relatively new idea that have recently surged in popularity. But just what is a media wall, and can you build one in your home?

Read on to find out.

WHAT IS A MEDIA WALL?

Media walls have been around for a little while but, if our sales of wall mounted electric fires and the evidence we see in photos from our customers is anything to go by, they are becoming a huge trend.

These are essentially a wall that is specifically built to house your TV, other media devices (such as Sky boxes, games consoles and speakers) and an electric fire.

WHAT TYPE OF FIRE CAN YOU HAVE IN A MEDIA WALL?

Electric fireplaces. These are ideal for this kind of set up as they negate the worry of adverse effects from heat to your TV.

Some even offer the option of mood lighting, like the eStudio electric fire, which can be selected with an option LED Mood Lighting System that can be easily installed around a TV for colours that match the selection on the fireplace below.

DO YOU NEED A CHIMNEY BREAST OR FIREPLACE TO CONSTRUCT A MEDIA WALL?

To put it simply, no, not at all! Advances in the design and aesthetics of electric fires, coupled with the slimline styles of TV’s a media wall no longer needs depth for installation.

An increasing number of new homes are being built without fireplaces, and this has taken the media wall trend to the next level. Rather than fixing a TV to an existing wall, homeowners are increasingly building walls specifically to house both their TVs and electric fires to create a focal point in their living spaces.

Often, though not always, the building of a media wall entails creating a fake chimney breast out of stud walls. This serves several purposes, including:

  • Providing the depth to hide all associated wires within the wall.
  • Allowing for appliances to be recessed, creating a neat finish.
  • Adding character and a focal point to new-build living rooms.

HOW A MEDIA FEATURE WALL IS BUILT.

As mentioned above, a media feature wall is normally constructed from a stud wall. The stud wall effectively juts into the room in the way a traditional chimney breast would. It will usually be built from a wooden frame and plasterboard. The frame is customised to provide recesses that match the dimensions of the television and electric fire that will be inset within it.

All of the electrical work runs into the back of the stud wall so that the appliances can be plugged in and then slotted into place. The flush finish and absence of messy wires is one of the key attractions of wall mounted electric fires and wall hung TVs.

BENEFITS OF A MEDIA FEATURE WALL

We’ve already mentioned that you get to hide all the wires from the appliances out of sight within the wall. Another benefit is the space-saving potential. Yes, if you’re building a stud wall where there is currently nothing then it will take up some of your floor space. But if you want a fire and don’t currently have one, a media wall needn’t take up much more space than a TV stand but will tidily house the fireplace and a TV. And since electric fires and televisions tend to be slimline, there’s no reason for your new wall to have the depth of a traditional chimney breast. You can even incorporate additional storage into your media wall design integrating storage space such as shelves, cupboards and drawers.

If you are considering installing a media wall in your home and would like advise or more information, please contact one of our showrooms.

Edinburgh: 0131 657 2246

Dunfermline: 01383 724565

info@livingfires.co.uk

Multi-Fuel or Wood-Burning, The Benefits of Having a Fuel Flexible Stove.

At Living Fires, we provide a large choice of stoves and many of these are available in both multi-fuel and dedicated wood burning versions. We pride ourselves on supplying the high quality multi-fuel stoves with a variety of designs such as traditional styled and modern sleek designs. But a question we often hear from clients is – “What are the advantages of multi-fuel stoves?” We’ve put together this quick rundown to explain how a multi-fuel stove is different from a dedicated wood burner and the benefits of having a fuel-flexible stove.

WHAT MAKES A MULTI-FUEL STOVE DIFFERENT?

It really is as obvious as the names suggest, multi-fuel stoves allow you to burn a choice of different fuels. They can burn logs just like a dedicated wood burning stove. But unlike a pure wood-burner, they can also burn smokeless mineral fuels when required.

How do they do this? Well, as you most likely know, logs and smokeless mineral fuels combust in different ways and at different temperatures, so multi-fuel stoves have a versatile firebox to allow them to burn either fuel with high efficiency.

Wood burns best on a bed of hot ash, with combustion air igniting the gases in the flames above. Smokeless mineral fuels, on the other hand, need combustion air beneath them to burn effectively.

To create optimum burning conditions, multi-fuel stoves have a riddling grate at the bottom of the firebox. The stove’s riddling grate allows air to circulate beneath mineral fuels for a high-efficiency burn.

THE BENEFITS OF HAVING A FUEL FLEXIBLE STOVE:

CHOICE OF FUELS

The great advantage about a multi-fuel stove is that they can burn a range of different fuels, this includes wood, peat and coal. Smokeless mineral fuels also have a higher calorific value than wood, so you get more heat per bag of fuel. In smaller dwellings, such as cabins, lodges, or houseboats, where there is limited storage space, having the option to burn smokeless mineral fuels can be particularly useful.

HIGHLY EFFICIENT

Multi-fuel stoves are extremely efficient, with some stoves boasting an efficiency rating of 80% plus. Having an efficient stove means that the heat which is produced from burning wood or coal is maintained, and not lost through the chimney or flue. Multi-fuel stoves also reduce the amount of fuel used to create heat. In addition, many of our multi-fuel stoves offer a clean burn system which will recycle the excess gases to the flames to be burnt off efficiently.

SUITABLE FOR DIFFERENT LOCATIONS

As well as authorised smokeless mineral fuels, our huge range of Ecodesign Ready multi-fuel stoves can also burn wood with exceptionally low emissions. Many are also suitable for DEFRA Smoke Control Zones, meaning they can burn either fuel type in even the most urban of homes.

LONG LASTING

Not only can a multi fuel stove heat your home for many hours, but they are well and truly built to last the test of time. Many multi fuel stoves are built from cast iron, one of the strongest metals, this enables the stoves to reach high temperatures without the metal bending or flexing under the hear.

GOOD LOOKS

Many people decide to purchase a multi-fuel stove as an efficient way to heat their home. However not only do they heat your home, they also look fantastic! Buying a multi fuel stove creates a real focal point in any room, offering a warm cosy feeling on those winters nights.

If you have any questions about any of our multi fuel stoves, please do not hesitate to get in touch with one of our stove experts by calling us directly or emailing info@livingfires.co.uk.

Fire Alarms, All You Need to Know Ahead of the New 2022 Regulations

Time to wake up! The legislation around fire alarms installed in all Scottish homes is changing with the new standards being implemented from 22nd February 2022.

This legislation is being introduced now as a response to the tragic fire at Grenfell Tower in London. A Ministerial Working Group on Building and Fire Safety was established to review Scotland’s building and fire safety regulatory frameworks. This legislation was introduced in January 2019 and will ensure that everyone in Scotland has the same level of protection whether they own or rent their home.

SO, WHAT’S INVOLVED?

The new fire and smoke alarm standard requires:

  • one smoke alarm installed in the room most frequently used for general daytime living purposes
  • one smoke alarm in every circulation space on each storey, such as hallways and landings
  • one heat alarm installed in every kitchen

All alarms should be ceiling mounted and interlinked.

Where there is a carbon-fuelled appliance (such as boilers, fires (including open fires) and heaters) or a flue, a carbon monoxide detector is also required which does not need to be linked to the fire alarms.

WHO WILL BE IMPACTED?

All housing types will be covered by the new standard, as it is important that all homes should be safe for occupants regardless of tenure. It will be the property owner’s responsibility to meet the new standard, however, the legal duty to enforce the standard rests with local authorities. Where owners are unable to meet the standard, it is not a criminal offence.

All homes must meet the minimum standard of the legislation and, where there is a requirement for specialist equipment, this should be installed in addition to the equipment installed to meet the standard (e.g. for deaf people or telecare/community alarms).

HOW LONG DO YOU HAVE TO MAKE SURE YOUR HOUSE COMPLIES?

These regulations were due to come into force in February 2021, however, in light of difficulties caused by COVID-19, the implementation of this legislation has been delayed for a period of 12 months to February 2022. Obviously, installing alarms at the earliest opportunity, will provide improved fire safety in your home.

If you already have smoke alarms fitted in your home but they are not interlinked you do need to change these to interlinked ones. The requirement of the legislation is to have all alarms interlinked. You may not hear the alarm closest to the fire but, by having an interlinked system, you will be alerted immediately.

HOW TO SELECT YOUR NEW ALARMS.

There are two types of alarms that comply with the new standard:

  • Tamper proof long-life lithium battery alarms, which can be fitted by householders themselves or;
  • Mains-wired alarms, which are cheaper than tamper proof long-life battery alarms, but should be installed by a qualified electrician in accordance with BS7671.

Although cheaper, mains-wired alarms are required to be installed by an electrician which will be an additional cost to homeowners. Any re-decoration to walls and/or ceilings should also be taken into consideration. You may also need a building warrant if you live in a flat.

Both types of alarms are available to purchase online or in store from many retailers. Some retailers are offering various payment methods which allow the cost of the new alarms to be split over a period rather than a one-off payment. Several retailers currently have dedicated sections on their website designed to help consumers in Scotland to buy alarms which meet the new standard and some are offering ‘bundles’ of these alarms which can be cost effective and makes the purchase process easier.

WHICH ALARMS WILL SUIT YOUR HOME BEST?

First choose whether you want battery powered alarms which you can fit yourself (or can be fitted by a handyperson if you don’t feel confident) or hard wired alarms that require to be fitted by a certified electrician.

If you choose battery alarms, they must be tamper proof long-life lithium battery powered and must be capable of being interlinked. The carbon monoxide alarm must have a sealed battery for the duration of its operational lifespan, which may be up to 10 years. If you are using an electrician to install alarms, you can also seek their advice on what alarms to buy as some may include alarms as part of their service.

Once you have chosen which system to install, choose a reputable brand, make sure the packaging clearly displays compliance with BS EN14604:2005 for smoke alarms and BS 5446-2:2003 for heat alarms.

Carbon monoxide alarms should have the British Kitemark (EN 50291-1)

COST

Any costs of upgrading fire and smoke alarms is the responsibility of home owners and landlords. The cost of the alarms will vary according to what you currently have in place and the alarms you choose to install. It is estimated that the cost for an average three bedroom house which requires three new smoke alarms, one new heat alarm and one new carbon monoxide detector will be around £220. This is based on using the type of alarms that you can install by yourself without the need for an electrician.

Depending on your home situation there is some funding available for assistance and installation. However, as a general principle, home owners are responsible for the costs of on-going work needed to protect and preserve their own property. As with other housing standards, it will be the responsibility of the homeowner to meet the new fire and carbon monoxide alarm standard.

HOW WILL THE NEW STANDARDS BE MONITORED?

Most home owners want to make their homes as safe as possible. Compliance will also form part of any Home Report should you decide to sell your home. As this will be a minimum standard for safe houses, local authorities could use their statutory powers to require owners to carry out work on substandard housing.

You can find more details and the full information of the new standards here

5 Ways to Freshen up Your Fireplace for Spring

Once you’ve done with the annual spring clean of your fireplace, packed away the firelighters and log basket for another year, your fireplace can end up looking a little forlorn and uninviting.

We don’t know about you but we are ready for spring. This winter feels like it’s gone on forever and we are loving seeing all the bursts of colour in gardens, lambs in the fields and the odd ray of bright sunshine making an appearance at last!

Here we look at 5 unique ideas to help freshen up your fireplace and keep it in-tune with the rest of your living space ready for the warmer days ahead. 5 quick, easy and budget-conscious ways to freshen up your fireplace for spring. Find out how changing a few simple things can bring your home out of hibernation and transform an entire room!

  1. Bring the Outside In

Fill vases with your favorite blooms and place them on the mantle remind you that spring is here. Buy an inexpensive bouquet at the grocery store and split it up into small posies. We love the eclectic look of mismatched vases or mason jars, and the trend of decorating with vintage watering cans in spring and summer is always a winner!

Don’t forget nature’s other gifts as well, gather branches, moss and pebbles and place them either in or around the base of your flower arrangements. Remember to dry them well first or use a protective mat to avoid marking your mantel.

2. Two Words – Feature Wall

Feature walls have been trendy for a good few years now and their popularity hasn’t waned over time! There’s a very good reason for this – a feature wall brings the room to life without making the room feel crowded or clashing.

The wall your fireplace is situated on is an ideal location for a feature wall as it’s already a focal point in your living space. Be bold with your new background choice and choose something you love. A feature wall consisting of patterned wallpaper or a vibrant colour will draw attention to the area and add a lot of personalisation to your living space. From flowers to birds, geometric prints to city scapes, there are so many wonderful designs when it comes to choosing a wallpaper that suits you.

Spring is the time to paint, since you can finally open your windows and let the fresh air in.  If you’re thinking of simply painting the background behind your fireplace a single colour, then deep blue, mustard, forest green, rusty browns and grey shades are all fantastic choices that follow this year’s interior trends.

Try adding in accessories to complement your wall and matching these to mimic the paper designs or paint colour for a harmonious look.

3. Fill The Fireplace

Now is the perfect time to sweep away the ashes of winter fires and start fresh. Fill your fire basket with plants, an arrangement of candles, or a display of beautiful birch logs. Alternatively, a huge rise has been seen in the trend of covering the fireplace with an attractive, modern folding screen.

4. Play with Punches of Yellow

Nothing says “spring” like the colour yellow and Pantone 13-0647 ‘Illuminating’, a bright yellow, is dominating design styles this season. Daffodils are a fresh, inexpensive style accessory that not only freshen up your home but also gives your home a nice spring touch. A tall glass vase daffodils can bring instant style into the lounge for spring.

Make your fireplace mantel decor simple yet stylish by arranging with favorite yellow pieces such as artwork, candles, and ornaments alongside flowers in a vase. Stagger items of different heights and widths in front of each other to create depth – which is key to an attractive display. If you have time to DIY more, you can also do wreaths and garlands to hang over your fireplace mantel

5. Mirror image

The chances are your fireplace isn’t situated under your window, but rather opposite or on a side wall. This means it’s a part of the room that gets the most light. Using a mirror to take advantage of that is a great way to decorate your mantlepiece in the spring. As the days become longer we get more natural light to play with. A mirror can reflect this natural light and bring the feeling of more space to your living room. If your home feels light and spacious, it will most probably put you in a better mood – or shall we say ‘put a spring in your step.’

A Final Note

Nothing says ‘home’ more than personalisation. Not only does your fireplace make a beautiful feature statement in your home – it’s a great blank canvas to personalise with photos of loved ones, cherished trinkets and quirky mini blackboards featuring cute messages. Mid to late spring may be spring cleaning time, but it is also a prime time for a clear-out in the home, so you may come across items in your loft, cupboards or stowed away boxes that you had previously forgotten about. This could include vintage glass bottles, ornate clocks, the children’s old trophies and good-looking old leather-bound books! Anything goes when it comes to personalising your mantlepiece – it’s just a matter of visualising and being creative.

The Go Eco Adventurer Glamping Stove

There’s a new kid on the block and we’re excited!

Let us introduce you to a new type of stove, the glamping stove. Ideal for small outbuildings, narrow boats, conservatories and even tents, pods and yurts; Glamping stoves are both portable and efficient. As we embark on a new era of flexible working and with more and more garden offices being built in outdoor spaces, these stoves are the perfect solution for isolated warmth when the whole house doesn’t require heating. The Go Eco Adventurer stove even has a top for a kettle or pot and can be upgraded to include an oven, warm cookies at the desk anyone??

Practical, incredible attention to detail and exceptional craftsmanship quality. Safe, stylish and built for purpose; This is what separates the new Go Eco Adventurer range from other glamping stoves currently on the market.

The Go Eco Adventurer is redefining quality and efficiency for anyone looking for a glamping stove that does it all. Perfect for yurts, narrow boats, shepherd’s huts or for those simply looking to enjoy their garden rooms and summerhouses all year round – the Adventurer is the perfect heating (and cooking!) companion.

This glamping stove really hits the mark as being the ultimate in warmth, character, ambience, practicality and versatility.  A fresh design by an experienced team, this highly specified little stove provides much more than meets the eye in both function and styling. DEFRA exempt for smokeless zones and already approved for use beyond 2022 Ecodesign regulations.

The Adventurer has a heat output of 4.5kW which is plenty enough to keep you warm in the winter or on those chillier evenings. This stove is designed to burn both wood and smokeless fuel and has an impressive efficiency rating of 86% which ensures you get the most heat out of the fuel you use. It’s large viewing window means you get an excellent view of the flames and the powerful airwash system will maintain a cleaner glass.

Standard features include a large-size cooking top, multi-fuel equipment, powerful air-washed glass window and durable stainless-steel fittings, trims and fixings. Versatile heat shielding packages ensure that every application is catered for whilst a host of optional accessories can further personalise the stove to meet individual needs.

The freestanding heatshield package is designed to provide a complete solution, including hearth, for stable installations into combustible surroundings. The steel sides may be safely sited, as close as 70mm at the sides and 75mm at the rear, to combustible wall materials. Independently safety tested to EN13240, the heatshield package is a tightly tailored solution for simple stove siting. When fitted with the heatshield package this versatile stove has countless options. Attached directly to the stove body itself this system lends itself to camping pods, tents, yurts, cabins and, in combination with the marine hearth the system, lends itself to narrowboats and other situations where space is at an absolute premium.

The Go Eco Adventurer has various optional accessories to cater to your every need. Specially designed and interchangeable these include:

Warming shelves. These are very popular and can be positioned on either side of the stove, providing a handy area to warm a kettle or pan. These can be fitted with either of the heatshield packages and all other accessories.
An insulated lift-off modular oven. This comes complete with temperature gauge, handles, two wire shelves and optional glass door. It’s large enough to fit up to a 22cm casserole dish or 27 x 22cm baking tins.
A solid stainless fiddle rail. The fiddle rail adds safety to your stove preventing your kettle or pan and kettle from falling off. Again, this is compatible with all other accessories.
Marine hearth unit. For narrowboats and very compact spaces, the BS8511 compliant marine hearth unit is available. If you wish to install this stove into a narrowboat or a very compact space, the marine hearth is an essential accessory.
Log store. The tailored log store may be fitted to the base of the stove for added height and convenience.

As you can see, there are plenty of options available to suit whatever glamping or canal boating needs you have. Enhance your small space with the Go Eco Adventurer. It’s simple, yet attractive design will compliment both modern and traditional interiors and it’s tall design means that it won’t take up too much room.

A final recap. The Go Eco Adventurer is a convenient, slim and practical glamping stove. Key features include:

• Attractive, characterful design enhances any living space.

• Extra-large air-washed flame-viewing window.

• Standard stainless-steel cooking top that accommodates pans up to 28-30cm.

• 86% efficiency, A+ for best in class performance.

• Stainless-steel handle, trims, ashpan and all fixings for durability and long service.

• Separate simple air control sliders for air wash and primary under-grate air.

• Multi-fuel equipped as standard.

• DEFRA exempt for smoke control areas as standard.

• SIA Ecodesign 2022 compliance for future-proof peace of mind.

• Optional oven accepts 22cm casserole or up to 27 x 22cm baking tins.

• Unrivalled heat shielding options for multiple installation configurations.

For more information about any of our wood-burning or multi-fuel stoves, please click here to visit our website. Our expert team look forward to helping you to choose the right wood-burner or multi-fuel stove for your living space.

Spring Cleaning and Re-Lighting Your Morsø Forno

Whilst many Morsø Forno owners cook in their outdoor ovens all year round, most of us cover them up for the winter period, not wanting to face the bleak Scottish winter in pursuit of a perfect stone baked pizza!

As British Summer Time has now officially begun and spring is in the air, what should you do to ensure you Morsø Forno is up to tip top condition and ready to relight?

Get set to peel back those protective covers and prepare to fire up great food this summer.

Internal Cleaning

As you most likely know, Morsø Forno outdoor ovens are incredibly easy to keep clean. The high temperatures inside a wood-fired oven mean that the inside self-cleans. As for the oven floor, if you’ve used pizza stones before you’ll be familiar with the fact that they discolour with use. In fact, some people regard the darker surface like a bit of a badge of honour, showing how well used the stones are. Pizzas stones should never be cleaned with detergent, they are porous, will absorb the cleaning materials and taint the taste of your food.

For everyday cleaning, the cast-iron surfaces can be wiped with a damp cloth or washed with a mild solution of soft soap when the stove is cold. Preferably use demineralised water, as ordinary water can leave lime-scale.

Dealing with External Rust

The Morsø Forno oven is made from cast iron with a protective painted surface. Over time the surface can also become slightly oxidised and grey in colour, and if the painted surface is damaged (such as stones being flicked up by lawnmowers) small spots of surface rust can appear, these are easy to repair.

Every Morsø Forno oven comes with a revitalising and maintenance kit. The supplied abrasive sponge, or a fine sand paper/emery paper, can be used to gently remove the light surface oxidization. The Morsø spray paint for outdoor use (UHT 600), which is colour matched to the oven, can be used to recoat the area. Make sure the surface is totally clean and dry before applying a new, thin layer of spray paint.

Do not use stove blacking on Morsø Forno ovens. Stove blacking cannot stick to enamelled Morsø Forno’s; the surface becomes blotched and may flake when the stove is heated. The surface of painted stoves will also become discoloured and blotched if you use stove blacking. Stove blacking should only be used on old stoves that have been ground or sandblasted. Painted stoves must be painted with Morsø Senotherm paint, and enamelled stoves only need be washed with hot, distilled water and brown soap.

Polish and Shine

The glass door can be cleaned by using an approved glass cleaner. Alternatively, warm soapy water and newspaper can be used but only when the stove is cold.

Servicing

The stove needs to be cleaned and serviced fully at least once a year but naturally this depends on how much the stove is used. The baffle is removed from the stove and cleaned up – using a nozzle or an Ash Cleaner. An Ash Cleaner is also suitable for cleaning the rest of the stove. Note that the stove must be cold when cleaned.

Maintenance of Other Parts

After a long winter, it’s a good idea to refresh and treat all your other Morsø Outdoor products. To clean Morsø Garden and Terra tables wash the table well and wipe the surface with cooking oil. This extends its service life and looks attractive. The stainless-steel hangers on the side of the table can be freshened up using an abrasive sponge (grain 180). Again, rust spots can be polished off gently and, after washing, treated with cooking oil. Outdoor tools, for example, the ash scraper and fire tongs can be easily polished with an abrasive sponge (grain 180) and then treated with oil to look as good as new.

The beauty of these ovens is that they can be maintained so easily and by spending just a few minutes caring for them at the start of every season your Morsø Forno will keep looking as good as new.

Get Your Garden Set for Summer

Is your garden looking a little beaten and drab after the onslaught of the long Scottish winter? In this blog we look at getting your garden summer ready with 5 easy tips for a gorgeous outdoor space.

Once the sun starts shining we are all itching to drag out the garden furniture, soak up the rays and make the most of whatever space we have. However, it’s worth taking a moment or two to get your garden in shape for the summer months. By making sure your outdoor space looks attractive it becomes an extension of your indoor living space – another amazingly colourful room full of life for the whole family to enjoy. From walled courtyards to large grassy gardens, we’ve got some great ideas to help you get set for a summer of outdoor living.

  1. Whip Your Garden into Shape

Start by making the most of what you already have. You’ll be surprised how much basic garden maintenance will perk up your outdoor space and make it feel like somewhere you can relax in.

It’s time to channel your inner Titchmarsh …

Love Your Lawn

Just give it a mow! There’s nothing nicer than a freshly clipped lawn, it looks great and smells amazing. If it’s looking less than lush, sprinkle with seed and water regularly.

A neatly mown lawn is a joy to behold in a British summer garden, so make sure yours is in tip-top condition. Re-sow any poor patches, aerate it to encourage root growth and give it a good scratch with a wire rake to allow light and water to reach the soil. It’s also a good idea to remove the most common lawn weed, the white-flowering clover. Pull them out individually by ripping out the stems, as this will hopefully avoid the plants getting established. Remember to not mow less than 1cm height off your grass – cutting it too short will give you a far less healthy-looking lawn.

Patio/Decking

Remove any moss or weeds from between paving flags and give decking some much-deserved love by sanding and re-treating with a stain or protector. If you have a jet washer, giving any paving a quick blast will transform it from tired slabs to almost new!

Banish Those Weeds

Weed out all the undesirables from borders and pots, and turn over the soil for a fresh, maintained look. Recruiting extra hands can make a big job smaller, and more fun! Get family and friends round to help, you’ll be surprised how quickly it comes together.

Keeping weeds at bay can seem like the never-ending task. If you are given or buy any plants always check them over before you introduce them to your garden. In the lead up to summer, you want your garden looking it’s the best right from the pathways and walkways to the lawn and borders. If you do find you’re losing the battle and have missed the moment to tackle weeds as you find them, you may wish to call in the cavalry with a specifically designed weed control product.

2. Paint And Treat The Fence

During the winter months, there is likely to be detrimental conditions for your garden fence. Before summer comes it is a great idea to give your fence a revitalised look of colour and health. Use a treatment such as Creosote to give it the extra protection it needs from those hot sunny days.

3. Clear Out the Shed

Over a long winter, you tend to stockpile a lot of odd bits which usually results in a chaotic mess that is in desperate need of order. If you love your garden shed then this should be a priority. We usually find the best method of doing this is to follow these simple steps:

Remove everything from your shed.

Sort all items into groups of ‘keep’ and ‘don’t keep’.

Throw or give away everything in the ‘don’t keep’ group.

Think about what you have left in comparison to the size you shed, and be ruthless about what to keep if you still have too much.

Clean the inside of the empty shed.

Place the remaining items back in the shed in a sensible organised order.

4. Clean the Summer Essentials

Don’t just drag your barbecue out, show it some TLC first!  Depending on the type of barbecue or outdoor fire you have in your garden, it can vary in difficulty to clean and will certainly vary in how much it is affected by harsh winter conditions. If you have a masonry barbecue or fire pit you will have very little to do, however, you may have to remove any rust that has built up on the grill in wet conditions. If you have stored your barbecue away for the winter in might just be a case of a spring clean and dusting down before inviting the family and friends over for a feast.

If you have outdoor sofas and other furniture items then you will have to make sure they are pristine for all your summertime fun. It is recommended to take your cushions off any outdoor seating during winter, but if you forgot this year there are great ways to clean them with little hassle. Most covers should be made of a water-resistant material so a sponge down with warm soapy water and good air will have them ready to go.

5. Prepare to Entertain

Set the mood and ensure your BBQs and alfresco dinners extend well past dusk with simple outdoor lighting. Solar lights not only illuminate the surroundings but also add a little extra character, and allow you to enjoy your garden 24/7. Flickering tea lights in jam jars are another lovely way to inject instant charm, great for lighting before a BBQ or when the sun starts to go down.

Don’t forget the gazebo! You live in the UK and no matter what the weather forecast says, always prepare for drizzle. A pop-up gazebo is a perfect protection in case of a sudden downpour, store in the shed for quick retrieval in the event of precipitation.

Eating in the garden, garden parties and BBQs are all achievable with a summer-ready garden so get stuck into those spring gardening jobs and extend your living space.

For more information on the outdoor fireplaces, pizza ovens and other products Living Fires supplies click here.