Pizza Oven Breakfast For Two

And I said, “What about breakfast at Tiffany’s?” She said, “I’d rather you … fired up the Morso Forno!”

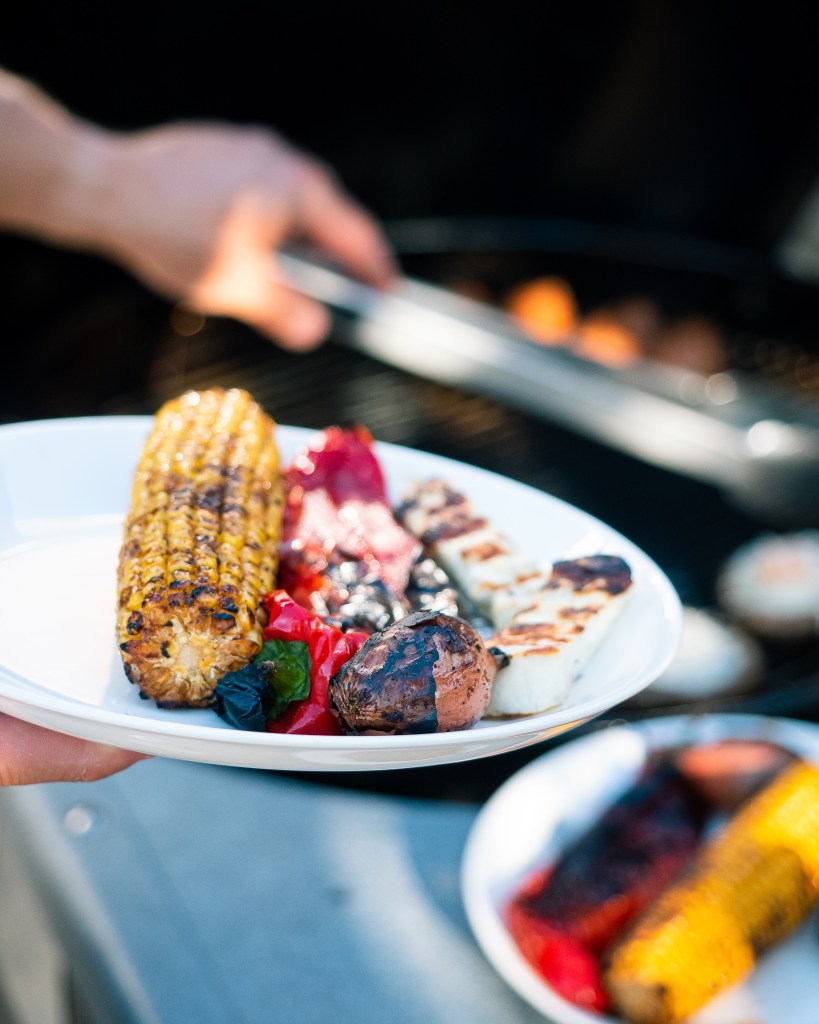
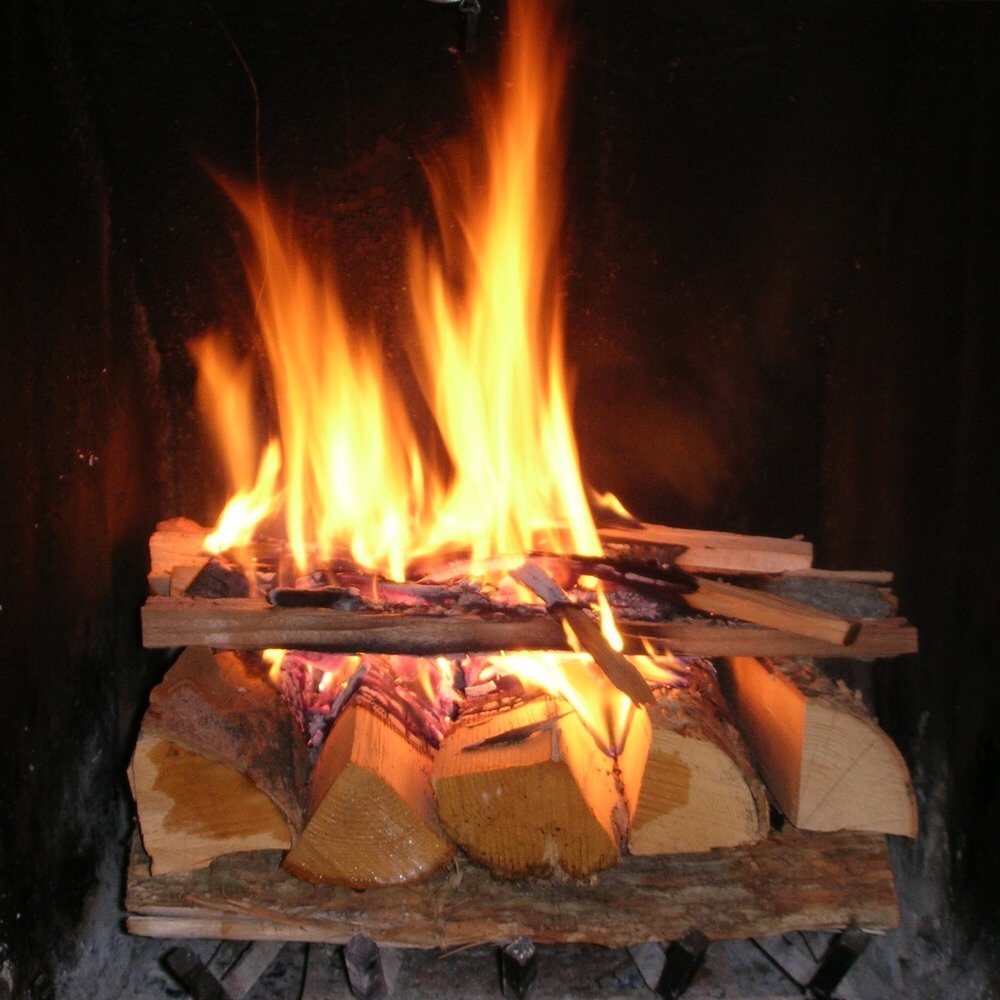
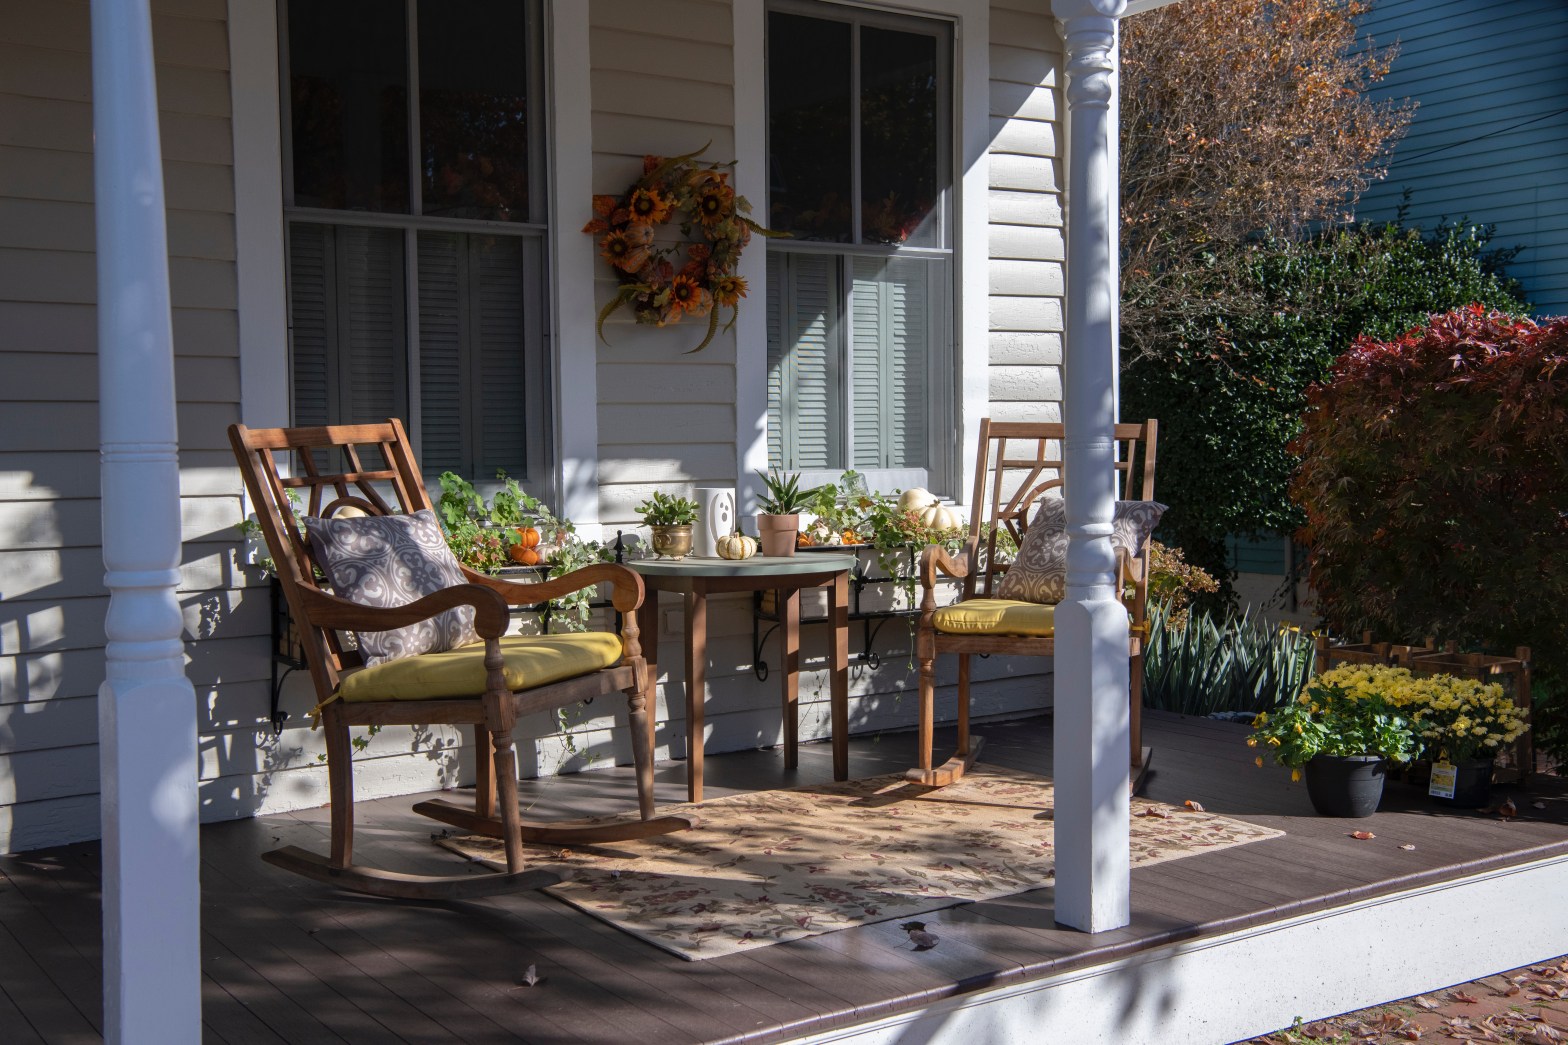
All this sun has got us eating alfresco whenever we can. So, to help you cater for every meal in the garden, here’s a great breakfast recipe for the weekend. Fire up that pizza oven and enjoy!

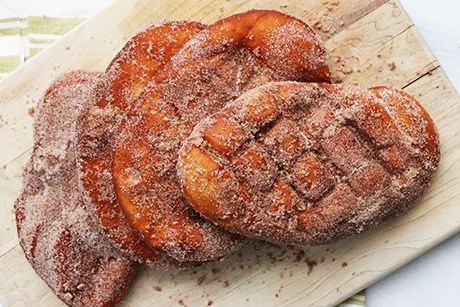
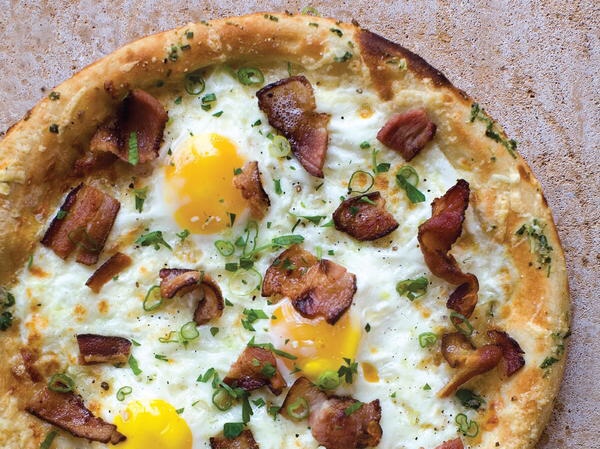
THE ULTIMATE BREAKFAST PIZZA RECIPE

This pizza was born to be made on a Saturday morning. Hungry for eggs and bacon? This pizza ticks all the boxes! A classic pizza base sprinkled it with parmesan and topped with mozzarella, bacon pieces and three fresh eggs. Seasoned with fresh herbs, salt, and pepper, and baked it until the egg yolks are set but still soft. You’re already setting the table aren’t you?

Makes: 2 pizzas (serves 2 to 4)

INGREDIENTS

• Bread flour, for dusting
• 6 bacon strips
• 1 quantity pizza dough (we recommend this recipe), shaped into 2 balls and refrigerated overnight
• ½ cup grated Parmesan
• 2 cups grated mozzarella
• 6 eggs
• Salt
• Freshly ground black pepper
• 2 tablespoons finely chopped flat-leaf parsley
• 2 tablespoons finely chopped chives
• 2 whole spring onions, trimmed and thinly sliced
• 1 shallot, finely chopped

METHOD

An hour before baking the pizzas, take the pizza dough out of the refrigerator and leave it in a warm area till you’re ready to use.

To make the pizza:

Preheat the pizza oven to around 450°F.
Generously dust the surface of a pizza peel (a flat wooden or metal shovel with a long handle) with bread flour.

Heat a large sauté pan over medium-high heat, add the bacon strips, and pan-fry until crisp. Put the bacon on a plate lined with paper towels, let it cool, and then chop it into bite-size pieces.

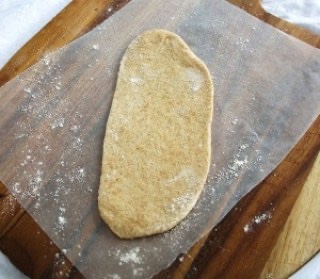
Lightly dust a work surface with bread flour. Working with one ball of pizza dough, dip your hands and the dough in the bread flour to make them less sticky, and pat the dough down into a disk shape with the tips of your fingers. Once the disk is large enough, drape the dough over your fists and carefully start stretching and expanding the dough from underneath to form a round that is 10 to 12 inches in diameter. (If you’re feeling lucky, try tossing the dough over your head in a circular motion to stretch it.)

Place the dough on the prepared peel.
Sprinkle it with half of the Parmesan, mozzarella, and bacon, and crack 3 eggs over the top. Season with salt and pepper to taste.

Before you put the pizza in the oven, do the “stick test”: shake the peel slightly to make sure the pizza is not sticking (if it is, carefully lift the section that is sticking and sprinkle a bit more flour underneath).
Slide the pizza directly onto the baking stone and bake it for 8 to 12 minutes, checking it after 5 minutes and rotating it if necessary to ensure that it’s baking evenly.

When the crust is golden, the cheese is melted, and the egg yolks are cooked to medium, use the peel to remove the pizza from the oven and transfer it to a cutting board.

Let it cool for 2 minutes and sprinkle with half of the parsley, chives, scallions, and shallots.

Slice and serve immediately.

Prepare your second pizza the same way.

How to Photograph Fire

Fire images can provoke a wide range of emotions, from joy and awe to fear and horror. Fire can be both comforting and dangerous. However, that said, we know how many of you love to snap a pic of your fire on in all its glory and share those cosy vibes on social media.

Fire photography is an exciting genre and you can capture very powerful photos using its light. These could be of the fire itself, people around the fire, interior and exterior landscapes. In addition to capturing the beauty of the light you want to be able to capture that wonderful atmosphere a fire creates.

Here we look at some top tips suitable for every level of photographer. So, whether your using a DSLR or snapping pictures on your phone learn how to up level your images below.

SAFETY FIRST

In the wise words of Frankenstein’s monster, “Fire Bad!” and this is especially true when photographing it. Follow these tips to help keep you and your camera protected.

• It’s easy to become disorientated when looking though a lens and end up much closer to the subject than you think you are, keep a safe distance. The heat and smoke can also damage your devise irreparably.
• Think ahead and plan your photo so you know exactly how you want to capture it. Have a plan to put out the fire if it’s one you are in control of, or know what safety precautions are in place.
• If you’re photographing a campfire or bonfire be sure to take car of the wind.
• Don’t ask anyone you’re photographing to get too close to the fire either.
• If you’re a beginner photographer experiment with sparklers and candles before practicing with larger fires.

SET YOUR CAMERA ON A TRIPOD

The key to a successful fire photo is using a tripod or support for your camera. This will support and steady your devise and help you to achieve a clearer image as the camera shake is reduced and consequently the chances of a blurred image.

TURN OFF THE FLASH

It simply isn’t needed for this type of photography. The fire is your light source.

BE CREATIVE WITH CAMERA SETTINGS.

On most smartphones there is now the option to increase and decrease exposure by tapping on the camera screen and adjusting the sun icon either up or down. On other cameras, such as SLRs there are three settings which will affect your exposure, they are aperture, shutter speed and ISO. To get the very best shots of a fire you need to experiment with these.

USE A SELF TIMER

As you’re photographing in low light conditions, it’s inevitable you could get camera shake, even on a tripod. You see, when you press the button the camera movely slightly and this can create blur in your photos. Try using a remote shutter or self-timer with the tripod/support to dramatically reduce camera shake.

MAKE THE FIRE THE MAIN SOURCE OF LIGHT

If you’re photographing fire in an indoor setting, such as a wood-burner or candle, turn off the other sources of light such as ceiling and table lamps for a more dramatic effect. Thanks to its warm colour and soft shades the fire is a perfect light source.

PRACTICE AND PLAY

Do you enjoy a cosy fire pit in your garden or bonfires at the beach? Do you like candlelit dinners? What about campfire marshmallow roasts? These are all great places to practice fire photography.

Vegetarian and Vegan BBQ Ideas

It’s BBQ season and we’re firm believers that BBQs are for everyone! However, sometimes, if you’re not a vegetarian or vegan, you can get a little stuck about what to cook so that all your guests can enjoy some tasty grilled treats.

Here’s four seasonal recipes to inspire you.

Before You Start

It goes with-out saying that you should always thoroughly clean your outdoor grill before cooking up a storm and grill vegan dishes before vegetarian and vegetarian before any meat.

(V) = Vegetarian (VG) = Vegan

CHARGRILLED SWEETCORN WITH CHILLI BUTTER (V)

Serves 4. This BBQ classic not only tastes great but any leftovers can be served on grilled focaccia, toast or even added to a risotto.

INGREDIENTS

4 sweetcorn cobs
100g butter softened
1tsp chilli flakes
a squeeze of lemon juice

METHOD

Grill the corn on the barbecue until tender.
Meanwhile mix together the remaining ingredients until combined.
When the corn is cooked add a good knob of the butter and serve.

CHARGRILLED SUMMER VEGETABLES (VG) AND DIP (V)

Serves 4. A bright and refreshing change from the ubiquitous aubergines and peppers. Experiment by adding different vegetables from the grill to change up this dish – wedges of red onion and chunks of baby gem lettuce are great!

INGREDIENTS

250g tenderstem broccoli, trimmed
4 courgettes sliced on the diagonal
12 large spring onions
1 romanesco cauliflower cut into florets
a little oil
200g Greek yoghurt
3tbsp harissa
a squeeze of lemon juice
4tbsp dukkah (a mix of toasted coriander seeds, sesame seeds and hazelnuts)

METHOD

Toss all the vegetables in a little oil and then season well.
Grill on the barbecue until charred and then put into a serving bowl.
Mix together the yoghurt, harissa and lemon juice to serve as a dip.
Sprinkle the dukkah over the vegetables and serve.

HOMEMADE FLATBREADS (V)

Makes 4-6 flatbreads. Great served with a dip or crunchy salad.

INGREDIENTS

175g self-raising flour
175g natural yoghurt
3tsp onion seeds (nigella or kalonji)
2tsp sea salt
2tbsp olive oil

METHOD

Mix all the ingredients together until combined
Form into 4 – 6 small, equal sized balls
Roll out flat
Cook directly on your grill for a few minutes (until browned) on each side.
Serve warm and fresh.

HOT COALS POTATOES (VG)

Serves 4. Sweet potatoes are perfect cooked in the coals of a barbeque or in a cooling pizza oven. Of course, you can bake them in the oven for around 40 minutes.

INGREDIENTS

4 large sweet potatoes
a little oil and sea salt
400g can cannellini beans
6 tomatoes
4tbsp flat-leaf parsley chopped
juice of 1 lemon
3tbsp olive oil

METHOD

Prick the potatoes with a fork.
Rub in the oil and sprinkle over sea salt.
Wrap in foil and bake on the edge of the grill for 1hr or until tender.
Meanwhile drain and rinse the beans.
Halve the tomatoes and scoop out the seeds, then chop into small pieces.
Put the beans in a bowl and add the chopped tomato, parsley, lemon and oil.
Season and serve with the potatoes.

Nordpeis Roma and Air

Introducing the BRAND NEW barbeque grill, fire pit and outdoor fireplaces from Nordpeis.

The Stovax Heating Group, who manufacture many of the breath-taking fires we offer, are venturing outdoors with a new range from Nordpeis. We’re excited to share their two new, ultra-stylish, product ranges, delivering Norwegian innovation to British garden design. These fires offer everything you need for versatile, al fresco, cooking and outdoor heating in your garden living space.

THE NORDPEIS AIR

This isn’t any outdoor fire, the Nordpeis Air is a smart outdoor barbeque and fireplace. With a stylish yet practical form this product is designed to burn natural firewood or charcoal.

The design options of the Nordpeis Air are endless, from a firepit model to a full garden kitchen complete with outdoor seating.
The firepit model is a perfect solution for an outdoor living centrepiece with its minimalist Scandi design and unfinished concrete exterior. You can even select an optional steel grill and windbreak to place on top of your fire pit for those evenings where you want to do a little relaxed cooking or toast up some s’mores.

The Nordpeis Air also comes as a functional BBQ Grill, designed to be both a statement and the ultimate kitchen for entertainment cooking. The BBQ Grill suite comes with a whole host of accessories from a handy steel tool rail for hanging your cooking utensils, a steel grill and windbreak for cooking, to a usefully considered anti-drip strip for keeping spillages at bay. The BBQ Grill model can also be selected with a variety of optional extras, including Kebony® wooden side shelves, a wooden shelf for the log store base below and an optional sizzle plate for an even more versatile cooking surface.

With its modular design, you can extend this BBQ Grill into an endless number of configurations, whether that’s additional bench seating using the extension modules, or building it up into a cubic outdoor kitchen island – kitted out with whatever you need to make your outdoor cooking experiences fun and easy.

THE NORDPEIS ROMA

A log burner and barbecue all in one! True to typical Scandi style, the Roma offers a stylish cylindrical design that allows you to both heat and cook in your outdoor space. Manufactured from lightweight concrete, and finished in light-coloured Thermotte™, the Roma offers an optimal view of the flames – perfect for when you are warming yourself by the fire on a late summer’s evening.

Whilst the material is extremely durable and shock-resistant, it is also very easy to assemble and install for an instant al fresco statement. Inside the Roma is a removable grill that can be slotted inside the chamber with the provided tools for open-air cooking.
The base of this chic concrete barbecue has been thoughtfully designed to provide a handy log store for not only keeping your fire fueled but also adding a natural texture to your garden space.

Feeling creative? If you wish to tailor your Roma further to a garden colour scheme, you can even paint the unfinished concrete with a silica-based masonry paint to suit your garden designs.

Wood Fired Canadian Beaver Tails

We couldn’t let Canada Day pass without an inspired recipe blog now could we?! This wood fired recipe is a delicious dessert or snack reminiscent of a Canadian childhood.

Beaver Tails, like churros are traditionally deep fried. This flame cooked twist on the traditional Canadian treat is super easy to make and will satisfy even the sweetest of tooth, it’s a total crowd pleaser. It’s great for using up left over dough, and is topped with a sweet cinnamon crisp. Tail us you’re not drooling already?

PREP TIME: 5 mins
COOK TIME: 5 mins
TOTAL TIME: 10 mins
COURSE: Dessert
SERVINGS – Makes 2-3 beaver tails, suitable for sharing but can be easily multiplied for hungry crowds.

INGREDIENTS

• 2 tbsp melted butter
• 2 tbsp brown sugar (add more, or less, to your liking)
• 1 ½ tsp cinnamon
• 250/330g classic pizza dough Check out this recipe to make your own dough

INSTRUCTIONS

Fire up your pizza oven to around 500 ˚C.

In a small bowl mix the brown sugar and cinnamon together.

Portion the pizza dough into three pieces and roll out into an oblong shape like a beavers tail.

Bake the pizza dough in wood fired oven until puffed golden – around 1-2 minutes.

Remove when done.

Brush with the melted butter, and sprinkle over the brown sugar and cinnamon mix.

Serve right away and enjoy!

The Scandinavian Fire Method

Did you know you can light a fire without a fire-lighter or tonnes of kindling? This Scandinavian fire technique is all about stacking your logs effectively. It catches very quickly and gives a cleaner burn too.

There are many different ways to start a fire. You’ve probably been shown the triangle or ‘pyramid’ method from a young age. You may also be familiar with the grid or ‘Jenga-like’ tower arrangement. Both methods suggest starting with kindling and once that’s burning, you add on your wood fuel. However, the Scandi or ‘top-down’ fire lighting approach is fast becoming the most popular and here’s we look at how it’s done and explore why it’s so well-liked.

DIRECTIONS:

Start by placing the largest pieces of kiln-dried firewood or hardwood logs at the bottom of your wood burning stove firebox or fireplace. When you start to build a fire, it is important to start with a good base. These should be the largest pieces in the load, 3” to 5” in diameter. If you are going to use hardwood logs then do bear in mind that they will expand once lit and are starting to burn, so remember to leave some space around them which will allow air to mix well with the fuel.

Build an extra level of wood fuel by placing a second layer of smaller pieces crossing on top of the main logs. These pieces are smaller than the large logs, half to three-quarters of the size of the main pieces. Always use kiln-dried wood – this is particularly important for your next step when adding kindling.

You have a few options in this next step. When placing a third layer of even smaller pieces crossing top of the second layer you can either stack this kindling in a grid shape, pyramid, or simply pile it up with a bit of space between the pieces to let the air flow around and through them. These pieces should be small, no more than 1” to 2” in diameter.

Spread some fine kindling on top of this. You can use thin split sticks or even cardboard.
Push several newspaper knots on top of the kindling. Rip off long sheets of newspaper, roll loosely, into a rope, and tie into a quick knot. Stuff four or five knots on top of the kindling, spread out across the width of the fire box.

Light the newspaper. If building this fire in a stove, make sure your stove damper is open or your combustion fan is on high. Then light the newspaper. A stick lighter is useful to quickly light several pieces of the newspaper and then quickly shut the door.

Enjoy your fire. Remember not to overload your burner – the assembled wood fuel should not sit above the fireplace opening. As the newspaper burns, it will ignite the kindling, and begin the slow downward climb through the logs. Depending on how many logs you loaded and how thick the logs are, you can count on two to three hours of beautiful flames. You’ll soon see why this is the best way to start a fire in a wood stove.


The top-down fire lighting approach will save you time, as you won’t have to check back later to ensure your fuel has caught fire. You will also notice that only a little smoke is produced, as the fire burns cleanly from the top of the stack.

This method can improve your overall wood fuel burning experience, as the top-down fire preheats your flue and warms the chimney without the obstruction of layers of wood fuel on top of your fire. If using a stove, remember to adjust your stove’s air intake after 10 to 12 minutes as less air is needed once your fire is blazing.

That Little Bit on The Side – Sauces, Dips and Dressings Ideal for BBQ Meals

Step away from the ketchup and try these 10 winning DIY condiments for your next grill party! There’s still plenty of barbeque season left but it’s easy to find yourself in a little bit of a culinary rut. Whether you like your grilled food spicy or sweet there’s a condiment here that will perfectly compliment it and inspire new life into your meals.

SAUCES

Middle Eastern Mint Sauce

Whizz up 35g fresh mint (a large handful), 2 tbsp pomegranate molasses and the juice of one lemon with 2tbsp water until smooth. Great with lamp kebabs, quinoa salad and pitta bread.

Green Chilli Sauce

In a blender whizz together a small bunch of chopped coriander, 3 grated garlic cloves, 3 large green chillies (chopped with seeds), 3tsp toasted cumin seeds, a pinch of salt and a pinch of sugar, 3tbsp natural yoghurt, 1tbsp lemon juice, 3 tbsp olive oil and a small bunch of chopped mint. Mix until well combined but still textured. This sauce makes for a perfect match when served with barbequed seafood.

Chefs tip: Reduce the number of chillies if you’re not a fan of heat.

DIPS

Korean Soy and Sesame Dip

Mix 4tbsp soy sauce, 2 tsp toasted sesame oil, 2tbsp sugar, 4 tsp rice vinegar and 2tsp wasabi, or horseradish, until smooth. Before serving, add in 3, thinly sliced spring onions (this keeps them fresh and crunchy). Goes great with chipolatas or grilled steak and bao buns.

Hot Mango Dip

Mix together equal quantities of mango chutney and whole grain mustard, add fresh lime juice to taste. Perfect with barbequed Cumberland sausages served with a crunchy salad in French baguettes.

Cream Cheese and Pepper

Mix equal quantities of cream cheese, red pepper and a chunky tomato salsa (we advise one that’s not too runny to create the best dip). Ideal served with nachos or chorizo sausages.

Horseradish Mayo

Mix mustard powder and horseradish to taste in mayonnaise with a squeeze of lemon juice and some sea salt.

Greek Yoghurt Dip

Mix together 200g Greek yoghurt, 3tbsp harissa and a squeeze of lemon until combined. Sprinkle over 4 tbsp dukkah (a mix of toasted coriander seeds, sesame seeds and hazelnuts) to serve. Tastes great with chargrilled vegetables or with toasted pitta bread cut into dipping strips.

DRESSINGS

Hot

Mix together 2 parts lime juice, 1 part soy sauce and 1 part sesame oil. Add a little castor sugar to taste. Stir in enough sriracha to add a kick.

Mild

Mix a crushed garlic clove with two parts tahini and one part lemon juice. Slowly stir in 2 parts water (more if needed) to make a smooth and running dressing. Season with salt and pepper.

Fresh and Tangy

Mix together 3 part extra-virgin olive oil, 1 part lemon juice, add Dijon mustard and lemon zest to taste. Season with salt and pepper.

Bright and Bold Interiors

Interior design has never been so energised and vibrant! Decorating in the 2020’s is all about making YOUR heart sing, creating your ideal living space, making it bright and being bold with the colours you love.

It depends on who you ask as to what the colours for 2023 are. Leading paint brand Dulux announced its colour of the year as a warm, golden shade of barley called Wild Wonder, while the team over at eco-kind Earthborn Paints have declared Lady Bug, a rich jewel tone-toned burgundy, as their hot shade of the year. Benjamin Moore’s offering, Raspberry Blush, is a vibrant shade of coral and Etsy’s duo of Indigo and Honeycomb is a timeless combination. Our preference and advice? Make it your own. Your home should be a space YOU cherish and the colours you select shouldn’t follow a trend but reflect your personal tastes.

Are you ready for a refresh?

Are you wanting to make your space a little more you?

A bit brighter?

A bit bolder?

Then these home decor trends offer all the inspiration you need to get started! Energise your space with bold pops of colour, oh-so touchable textiles or a mirror as fetching as your reflection. Bright colours aren’t just for summer. Using bold colours will always make your home feel lighter and sunnier, even in the cooler months. Just because summer ends doesn’t mean the fun has to! From tropical prints to bold colours, these interior styles are so cheerful and light you’ll be reaching for your shades!

CAN WE SKIP TO THE GOOD BIT?

Coloured focal points are a style that makes you smile and puts the ‘fun’ into ‘functional’! From mustard sofas to lime green sideboards, a bright-coloured piece of statement furniture can be the ultimate focal point of a room. 

Coloured stoves such as this beauty from Arada are not only fresh but a funky addition to your home decor too! Made with skill, care and a boisterous sense of fun, Arada Stoves have an extra special personality all of their own! Animated flames, bold colours and distinctive design set them apart from traditional designs and make them a true focal point of any living space. 

CUT SOME SHAPES

Shoulder pads at the ready! Abstract shapes reminiscent of patterns and textiles from the 80s and 90s are back! From splendid squiggles to really cool curves and bright colours, we’re loving the artistic touch abstract pieces add to any space. Curved furnishings such as sofas and shaped rugs adorned with printed cushions can help bring in these elements. Materials such as marble and walnut work well too as they mirror the swirling patterns and shapes of the era.

TV TV ON THE WALL…

Is this the fairest idea of them all? Media walls are a great way to freshen up a room without having to decorate the entire space. When painted in a contrasting colour to your room a media wall becomes a revitalising focal point. Long electric fires look brilliant in media walls, it’s a fact! With a guaranteed wow factor and with a range of effects available, they can also add a whole host of additional and changeable colours! 

ROLL IT OUT

Wallpaper can add a rare depth of colour and texture to an interior. When paired with a striking mantelpiece, you can transform the look of your fire and living space in just a few rolls. Try using it in alcoves and small spaces for a dramatic, yet simple, refresh. Select mood boosting-hues and these areas will be a pop of delight.

Location Location Location

Never mind celeb spotting, we’ve been spying some of the fires we supply in famous places from the homes of influencers to TV shows! From George Clarkes, Old House New Home, to the interior influencers at House Lust, we’re loving seeing the many ways these fires are installed and displayed.

We can’t help but be inspired by the homes of others, whether it’s new décor trends or garden layouts, how they match the fire’s aesthetic or even the installation locations of a fireplace. From living rooms to bedrooms, kitchens to summer houses, each look is unique and many of the results are stunning. 

You don’t have to be a professional home improvement blogger to create a space that’s unique to you, you just need a concept and a plan. It can be a big DIY project but with an impressive, personalised, outcome, we think it’s worth the effort.

Inspired by our findings, we’ve put together some ideas to inspire you for your next interior project.  

FIRES IN KITCHENS

The resurrection of fireplaces in kitchens is a rapidly growing trend. Electric fireplaces built into kitchen islands are not just a state-of-the-art design feature but a great way to combine areas in an open-plan design helping your room to flow and feel unified, making full use of all areas. You can create a great sense of visual harmony by choosing a fireplace that echoes the proportions and architectural features of your kitchen. 

This trend is ideal for those with open-plan living and dining areas creating a warming focal point and emphasising the space as the heart of the home

You can read our whole blog dedicated to fireplaces in kitchens here.

FIRES IN BATHROOMS

Bathroom fireplaces are the surprising trend everybody is searching for on Pinterest. There is nothing cosier than a real open fire in a room. However, bathroom fireplaces have become the unlikely trend that’s taking off this season. Homeowners are looking to create larger bathroom spaces that increase our sense of well-being and allow us to indulge in self-care rituals, and there’s nothing more indulgent than a fireplace in a bathroom.

Whilst you’re dreaming of period features and regency-inspired interiors that ideally suit this trend keep in mind that building regulations forbid the installation of an open fire or wood burning stove in a bathroom. There are of course many gas or electric fires that could work in with your design.

UNIQUE WAYS TO HAVE A FIRE IN THE LOUNGE

News flash! Fires don’t need to be in a fireplace! That’s right you don’t need to have an existing chimney breast or create a faux one in order to install a fire in your home. From dividing walls to unique units with built-in fires, there are many unique ways to include a fireplace in your main living area. We absolutely love this fire built into the wall against a staircase, what a way to use a space!

FIRES IN SUMMER HOUSES

Installing an electric fire is a very popular option for summerhouses because it does not require any changes in the building itself. There is no smoke, no need for oxygen or burning material supply, and no additional safety precautions you just need an electrical socket. Additionally, for workshops with lots of sawdust and the like, it might be an advantage that they have no exposed flammable heating elements.

Electric fireplaces combine the ease and safe handling of heating with the added bonus of resembling a real fireplace. This helps transform the space into a home away from home and an attractive room to spend time in during the colder months. 

You can of course install a wood-burning or gas stove in a summer house, though there are more risks to be considered. 

You can read more about fireplace choices for summer houses here.

FIRES IN HALLWAYS

One of the best and safest ways to dry out wet boots and jackets is to place them in a warm room without putting them in direct heat which can damage items. Low, constant heat is what’s required which is where an electric stove or fire can come into its own. Fully adjustable to the temperature you require when you need it, without having to heat the rest of the home. With many models being controlled by an app, you can set your fire to come on before your home from a rainy walk, a very welcoming sight!

FIRES IN BEDROOMS

An electric fire in the bedroom can create a stunning focal point, apart from the impressive heat they give out, they can also help create the perfect ambience if all you want to do is get comfy in bed and have the optional mood lighting and flame effect on. It’s up to you if you also want the fire to warm your room.

Now That’s What I Call Music – Fire Pit Hits 22

One of the best parts of any night round a fire is getting warm whilst roasting s’mores and singing some good ole campfire classics! Although it’s impossible to know who sang the first campfire song, singing songs together around a fire in the great outdoors has been a beloved tradition for centuries. It’s an age-old way to relax and enjoy time well spent.

While some campfire songs tell tales, others are explicitly written to be funny and sung along with. Whether you’re having a night round the firepit with the family or you’re off on a scout trip, we’ve pulled together a playlist of 10 classic fireside hits that are fit for any group and occasion. So, grab you friends, pick up a guitar and get ready to belt out these classic hits at your next garden gathering.

We’re Going on a Bear Hunt

Author Michael Rosen based his children’s book ‘We’re Going On a Bear Hunt’ on a similar song that emerged in the 1970s. The story is about of a group of siblings trying to find a bear before getting scared when they actually find one, the book was so popular that the words were adapted into beloved fireside song.

On Top of Spaghetti

‘On Top Of Spaghetti’ is also known as ‘The Meatball Song’. It’s set to the tune of the song ‘On Top of Old Smoky’ and tells the story of a meatball that falls from a plate of spaghetti and rolls onto the floor.

B-I-N-G-O

Everyone is familiar with this family-friendly hit. Kids love B-I-N-G-O because they can sing and clap along with the lyrics.

She’ll Be Coming Round The Mountain

The earliest known recording of this song is in the 1920’s but it’s been around for far longer. A great easy song for everyone to follow along with.

My Bonnie Lies Over The Ocean

Thanks to its slower pace and repetitive chorus, ‘My Bonnie Lies Over The Ocean’ is an easy song to sing for children and adults alike.

Home on The Range

An excellent song for any outdoor gathering telling a tale from the old American west.

You Are My Sunshine

Did you know this sweet, simple anthem is the state song of Louisiana? It has been recorded by over 350 artists and translated into 30 languages.

Baby Shark

Perhaps more irritating than ‘a song that will get on your nerves’ but this recent viral hit is an easily recognised song for all the family to join in with. The actions are loads of fun and can make some great fireside shadows too!

‘Brown Eyed Girl’ by Van Morrison

A love anthem for couples everywhere, Van Morrison’s Brown Eyed Girl is a fun song to sing, and clap, along with round the fire.

Ging Gang Gooli

You can’t have a sing-a-long by the fire without including this nonsensical, top beat tune traditionally sung and scout campfires! Young and old will long to join in with the silly lyrics and get the sway going. All together now…

Ging gang gooli, gooli, gooli, gooli watcha
Ging gang goo, ging gang goo
Heyla, heyla sheyla
Heyla, sheyla heyla ho